DMASOFTLAB RADIUS MANAGER BILLING SYSTEM v 4.1 Finally Released
DMASOFTLAB RADIUS MANAGER BILLING SYSTEM v 4.1 Finally Released
Finally DMA has released its new version for Radius Manager Billing System.
Complete info can be found here.
http://www.dmasoftlab.com/cont/revision
*** v 4.1.0 *** 2013-10-23 ***
NEW FEATURES:
↓-enhanced SMTP mailer with authentication and freely configurable port
-SMS alert indicating the account is going to expire ** This was most DEMANDED
-support for BulkSMS HTTP->SMS gateway ** This was most DEMANDED
-alert type is selectable in user preferences (ACP / UCP) ** This was most DEMANDED
-enable traffic report per user in ACP even if global traffic report is disabled
-service change is allowed for Hotspot MAC accounts
-auto logout expired ACP sessions
-FreeRadius 2.2.0 support
-DOCSIS upstream SNR data in CM overview table
-DOCSIS upstream SNR is available for each CM
-CMTS upstream SNR monitoring
-Mikrotik Gigawords support added for NAS disconnection mode (PPP, Hotspot)
-NAS disconnection mode total traffic limits are supported (Hotspot)
-Paypal Express Checkout order summary is available
-PayFast payment gateway support (South Africa)
-separate checkbox for IAS SMS verification
-option for filtering duplicate email and mobile numbers in self registration and IAS purchase
-Hotspot MAC users can edit account details in UCP
-recover lost IAS password
-option in system settings to add new managers and NASs to all services or not
-custom text field on PDF cards (print online time, MB, expiration, other text) ** This was most DEMANDED
-syslog record for all unix events and rmscheduler actions ** This was most DEMANDED
-syslog event for sent SMS, email ** This was most DEMANDED
-selectable user group in card generator module
-massmail select group option ** This was most DEMANDED
-prepaid service details on invoice ** This was most DEMANDED
-disable accounts due to expired contract (selectable option)
-user definable character set for card PIN codes and passwords
-find traffic data per NAS ** This was most DEMANDED
-find traffic data per AP ** This was most DEMANDED
-traffic summary per NAS ** This was most DEMANDED
-traffic summary per AP ** This was most DEMANDED
-bulk email supports UTF8 ** This was most DEMANDED
-bulk SMS with group support ** This was most DEMANDED
-separate poller pause for MT API access (radiusmanager.cfg)
-log unsuccessful RADIUS authentications
-restart radiusd automatically when updating / deleting / editing any of NASs
-option to exclude zero priced invoices in postpaid batch billing
-option to exclude disabled accounts in postpaid batch billing
-welcome SMS for all account types (IAS, self registered, regular, Hotspot MAC, DOCSIS)
-filter registration date in list users view ** This was most DEMANDED
-new registration method: mobile number is the user name, auto generated password is sent to cell phone ** This was most DEMANDED
-UCP payment success shows a disconnect button if next service is active
-ACP record login failures ** This was most DEMANDED
-filter activated / not activated classic prepaid cards ** This was most DEMANDED
-notifications sent in user specific language ** This was most DEMANDED
-selectable language per manager ** This was most DEMANDED
-multi language password recovery form
-enhanced password recovery (user name is mandatory due to possible duplicate email addresses) ** This was most DEMANDED
-configurable default sim-use value for self registered users
-user selectable views: list users, list online users, list online cm
-postpaid invoice status in edit user account overview
-disabled next service support (disabled ip pool etc.)
-multiple email address support per account
-show last logoff date in list users view (useful for finding inactive accounts) ** This was most DEMANDED
-self reg email + SMS activation option ** This was most DEMANDED
-captcha in self registration forms ** This was most DEMANDED
-authorize.net extended currency support (USD, CAD, GBP, EUR)
-optimized rmscheduler.php with delayed disconnection to gain speed
-logging new self registered and IAS accounts ** This was most DEMANDED
-quick last invoice overview (showing the last page first)
-added email address validation for UCP user edit, self registration, ACP registration, IAS purchase ** This was most DEMANDED
↓
↓
BUGFIXES:
-sim-use is added to privileged fields-account refill vulnerability fixed (UCP)
-user coordinate latitude / longitude fix
-rm_services cmcfg field size = 10240, enabling large tftp boot files
-entering privileged user data issue fixed in new user registration form
-carry over adds new credits to zero if the actual balance is negative
-duplicate PIN problem fixed when prefix is used
-generate card show own service only
-store new IAS mobile, email
-new user registration error fixed when apostrophe is used in service name
-rmacnt crash issue fixed
-list refill cards issue fixed
-dhcpd.conf file ownership issue fixed
-sim-use is no more editable when privileged data editing is disabled
-rmscheduler expired CM logout issue fixed
-store email, mobile number in IAS purchase
-ACP edit user restricted mode: disable CPE address fields
-added missing index parameter to 2CheckOut review cart
-self registration upper case user name problem fixed
-dhcpd.conf access mutex problem fixed
-blank password fix for regular and Hotspot MAC accounts
-ACP refill negative balance vulnerability fixed
-PayPal Payments Pro order total price higher than 1000 issue fixed
-scheduled service changes next page problem fixed
-language cookie path traversal vulnerability fixed
-UCP service change vulnerability fixed
-accidental authorize.net double charge issue fixed
-cancel monthly invoice even if it is active (negative amount is allowed)
-ACP / edit IAS grouped thousands price issue fixed
-online payment submit button issue fixed (Chrome issue)
-duplicate accounting issue fixed
-special periods connection problem fixed
December 27, 2009
Howto configure GMAIL as SENDMAIL RELAY :D (Also can be used with RM to send Email Notifications)
If you want to use GMAIL as your sendmail relay server, Use the below configuration.
{I required it to send DMASOFTLAB RADIUS MANAGER Email notifications to all users regarding there service status, account expiry, renewal , various alerts and other info. that’s why I wrote this guide, it maybe useful for others too . . Syed Jahanzaib }
OS Used: Ubuntu 10.4
First install Sendmail and its utilities.
1
| apt-get install sendmail mailutils |
1
2
3
| mkdir /etc/mail/certschmod 700 /etc/mail/certscd /etc/mail/certs |
(It will ask you various questiosn , just enter them accordingly, like country code, for Pakistan its PK, and other information you have)
openssl req -x509 -nodes -days 3650 -newkey dsa:dsa1024.pem -out /etc/mail/certs/mycert.pem -keyout /etc/mail/certs/mykey.pem
(It will ask you various questiosn , just enter them accordingly, like country code, for Pakistan its PK, and other information you have)
openssl req -x509 -new -days 3650 -key /etc/mail/certs/mykey.pem -out /etc/mail/certs/mycert.pem
1
2
3
| ln -s /etc/mail/certs/mycert.pem /etc/mail/certs/CAcert.pem chmod 600 /etc/mail/certs/* cd .. |
Now configure gmail SMTP authentication information, This file may be blank, just paste the text showed in code box.
1
| nano /etc/mail/authinfo |
↓
Save & Exit & issue below command
1
2
| AuthInfo:smtp.gmail.com "U:root" "I:USERNAME@gmail.com" "P:PASSWORD"AuthInfo: "U:root" "I:USERNAME@gmail.com" "P:PASSWORD" |
1
| makemap hash /etc/mail/authinfo < /etc/mail/authinfo |
Now Add the following configurations at the bottom of sendmail.mc file
1
| nano /etc/mail/sendmail.mc |
↓
1
2
3
4
5
6
7
8
9
10
11
12
13
14
15
16
17
18
| dnl #dnl # SSL Settingsdefine(`CERT_DIR', `MAIL_SETTINGS_DIR`'certs')define(`confCACERT_PATH', `CERT_DIR')define(`confCACERT', `CERT_DIR/CAcert.pem')define(`confSERVER_CERT', `CERT_DIR/mycert.pem')define(`confSERVER_KEY', `CERT_DIR/mykey.pem')define(`confCLIENT_CERT', `CERT_DIR/mycert.pem')define(`confCLIENT_KEY', `CERT_DIR/mykey.pem')dnl #dnl # GMAIL FORWARDINGdefine(`SMART_HOST',`[smtp.gmail.com]')dnldefine(`RELAY_MAILER_ARGS', `TCP $h 587')dnldefine(`ESMTP_MAILER_ARGS', `TCP $h 587')dnldefine(`confAUTH_OPTIONS', `A p')dnlTRUST_AUTH_MECH(`EXTERNAL DIGEST-MD5 CRAM-MD5 LOGIN PLAIN')dnldefine(`confAUTH_MECHANISMS', `EXTERNAL GSSAPI DIGEST-MD5 CRAM-MD5 LOGIN PLAIN')dnlFEATURE(`authinfo',`hash -o /etc/mail/authinfo.db')dnl |
Now rebuild sendmail config and start the service 
↓
1
2
| make -C /etc/mailservice sendmail restart |
Test the setup 
Use the below command to test the local smtp .- – - – -??
Regard’s
Syed Jahanzaib
November 30, 2012
DMASOFTLAB Radius Manager: Install + Backup + Restore [Short Reference Guide]


UPDATED: 10th JUNE, 2013
Following is a short reference guide for DMASOFTLAB Radius Manager
Part- 1) Installation Of RM with some TIPS,
Part- 2) Complete Backup for RM and RM DB,
Part- 3) Restore RM Data to new Installation .
PERSONNEL NOTE:
Please note down that you can get better installation instructions in detail from DMASOFTLAB official manual. This guide is a extracted version of original manual. Please consult with the original manual and dma helpdesk for official support. I have no affiliation with the DMA, its just my personnel experience you are seeing in this guide. It can be wrong, or might not be working as per your requirements. Just drop me an message or email for any correction or pointing. aacable [at] hotmail.com
Thank you
Syed Jahanzaib
Part-1 # Installation of Radius Manager 4.x on Ubuntu 10.4 [32/64 bit versions]
DMASOFTLAB Radius Manager 4.0 Short reference manual guide for UBUNTU 10.4 *** 32 /64 Bit VersionIf you have 64bit OS, then you have to download compatible 64bits packages from the dmasoftlab download section, just note down the 32bit files in this guide, and download 64bit version of same package from the DMA page.
After you have installed Ubuntu, configure IP address and enable internet access on it.
Now open Terminal Window and issue the below command to install required Modules. but make sure you do update ubuntu before doing any further process.
Create temp directory where you will download things
1
2
3
4
5
6
7
8
9
10
11
12
13
14
15
16
| mkdir /tempcd /tempapt-get updateapt-get
install mc wget rcconf make gcc mysql-server mysql-client
libmysqlclient15-dev libperl-dev curl php5 php5-mysql php5-cli php5-curl
php5-mcrypt php5-gd php5-snmp### For 32bit Only, download following two items and install themdpkg -i libltdl3_1.5.24-1ubuntu1_i386.debdpkg -i libltdl3-dev_1.5.24-1ubuntu1_i386.deb### For 64bit Only, download following two items and install themdpkg -i libltdl3_1.5.26-1ubuntu1_amd64.debdpkg -i libltdl3-dev_1.5.26-1ubuntu1_amd64.deb |
Now Download ioncube library
1
2
3
4
5
| ### For 32bit### For 64bit |
1
2
3
4
5
| ### For 32bittar zxvf ioncube_loaders_lin_x86.tar.gz### For 64bittar zxvf ioncube_loaders_lin_x86-64.tar.gz |
1
| mkdir /usr/local/ioncube |
1
2
| cd /temp/ioncubecp * /usr/local/ioncube/ |
e.g: in following files.
1
2
| /etc/php5/apache2/php.ini/etc/php5/cli/php.ini |
Add this line on top (in both files as mentioned above)
1
| zend_extension=/usr/local/ioncube/ioncube_loader_lin_5.3.so |
Installation procedure of FreeRadius
==============================
1
2
3
4
5
6
7
8
9
10
11
12
13
14
15
16
17
18
19
20
21
22
23
24
25
| cd /temp### For Rm 4.0.4### For Rm 4.1# for rm 4.0.4tar zxvf freeradius-server-2.1.8-dmamod-3.tar.gz# for rm 4.1tar zxvf freeradius-server-2.2.0-mod-1.tar.gz# for rm 4.0cd freeradius-server-2.1.8/# or for rm 4.1cd freeradius-server-2.2.0/### Now proceed with the compilation of FREERAIDUS , applicable for all./configuremakemake installldconfig |
Note: for new version of RM 4.1, use FREE RADIUS 2.2.0 freeradius-server-2.2.0-mod-1.tar.gz
Now test RADIUS by issuing following command:
1
| radiusd -X |

++++++++++++++++++++++++++++++++++++++++++++++++++++++++++++++++++++++++
TIP: After issuing make command , if you see errors like below
gcc -o .libs/radeapclient .libs/radeapclient.o libeap/.libs/libfreeradius-eap.so -lnsl -lresolv -lpthreadTo solve this this problem,Add followign directive
/usr/bin/ld: .libs/radeapclient.o: undefined reference to symbol ‘fr_perror’
/usr/bin/ld: note: ‘fr_perror’ is defined in DSO /root/freeradius-server-2.1.8/src/lib/.libs/libfreeradius-radius-2.1.8.so so try adding it to the linker command line
/root/freeradius-server-2.1.8/src/lib/.libs/libfreeradius-radius-2.1.8.so: could not read symbols: Invalid operation
collect2: ld returned 1 exit status
make[6]: *** [radeapclient] Error 1
make[6]: Leaving directory `/root/freeradius-server-2.1.8/src/modules/rlm_eap’
make[5]: *** [common] Error 2
make[5]: Leaving directory `/root/freeradius-server-2.1.8/src/modules’
make[4]: *** [all] Error 2
make[4]: Leaving directory `/root/freeradius-server-2.1.8/src/modules’
make[3]: *** [common] Error 2
make[3]: Leaving directory `/root/freeradius-server-2.1.8/src’
make[2]: *** [all] Error 2
make[2]: Leaving directory `/root/freeradius-server-2.1.8/src’
make[1]: *** [common] Error 2
make[1]: Leaving directory `/root/freeradius-server-2.1.8′
make: *** [all] Error 2
-lfreeradius-radius-2.1.8
in freeradius-server-2.1.8/src/modules/rlm_eap/Makefile .
Open it in nano/vi or any text editor by,
1
| nano freeradius-server-2.1.8/src/modules/rlm_eap/Makefile |
1
| $(LIBTOOL) –mode=link $(CC) $(LDFLAGS) $(RLM_LDFLAGS) -o radeapclient radeapclient.lo $(CLIENTLIBS) $(LIBS) $(OPENSSL_LIBS) |
1
| $(LIBTOOL)
--mode=link $(CC) $(LDFLAGS) $(RLM_LDFLAGS) -lfreeradius-radius-2.1.8
-o radeapclient radeapclient.lo $(CLIENTLIBS) $(LIBS) $(OPENSSL_LIBS) |
now run make and make install again.
1
2
| makemake install |
++++++++++++++++++++++++++++++++++++++++++++++++++++++++++++++++++++++++
Set the correct ownership on FreeRadius configuration files
================================================
1
2
| chown www-data /usr/local/etc/raddbchown www-data /usr/local/etc/raddb/clients.conf |
TIP:Review and edit (if required) the MySQL credentials in /usr/local/etc/raddb/sql.conf (Just in case you have mentioned different password/id for mysql)
.
Creating MySQL databases with MySQL command line tool
===============================================
1
2
3
4
5
6
7
8
9
| mysql -u root -ppasswordCREATE DATABASE radius;CREATE DATABASE conntrack;CREATE USER 'radius'@'localhost' IDENTIFIED BY 'yourpass';CREATE USER 'conntrack'@'localhost' IDENTIFIED BY 'yourpass';GRANT ALL ON radius.* TO radius@localhost;GRANT ALL ON conntrack.* TO conntrack@localhost;exit |
==================================
Time to Install RADIUS MANAGER 4.0.4
==================================
↓
Copy the radius manager radiusmanager-4.0.4.tgz (or your version) in any temp folder
now extract it using
1
2
3
| tar zxvf radiusmanager-4.0.4.tgzcd radiusmanager-4.0.4/chmod +x install.sh |
↓
↓Start RADIUS MANAGER Installation script
Execute the installation Script . . .(If you are new to radius manager installation, use default password scheme, it will save you from few headaches, BUT later on as you will get familiar with the system, CHANGE the default passwords as its risk to use default password)
1
| ./install.sh |
For example:
Select the Operating System
2
(For Ubuntu)
Select Installation type:
1
(New Installation)
WWW root path:
Press Enter to select the Default , which is /var/www
Radius Database host:
Press Enter to select the Default , which is localhost
Radius Database username:
Press Enter to select the Default , which is radius
Radius Database password:
Press Enter to select the Default , which is radius123
CTS Database host:
Press Enter to select the Default , which is localhost
CTS database username:
Press Enter to select the Default , which is conntrack
CTS database password:
Press Enter to select the Default , which is conn123
Freeradius UNIX User:
Press Enter to select the Default , which is root
Httpd Unix User:
Press Enter to select the Default , which is www-data
Create rmpoller service:
Press Enter to select the Default , which is y (yes)
create rmconntrack service:
Press Enter to select the Default , which is y (yes)
Backup Radius database:
Press Enter to select the Default , which is y (yes)
Now it will ask if you want to start the installation
Press y and press ENTER to continue the installation.
↓
and at the end you will INSTALLATION COMPLETE!
↓
As showed in the image below . . .
 ↓
↓
↓
Now copy the two license files (that you receive from DMASOFTLAB) in /var/www/radiusmanagerlic.txt
mode.txt
↓
Now access the admin panel from your browser
http://yourip/radiusmanager/admin.php
As showed in the image below . . .

.
 ↓
↓↓
Adding NAS (Mikrotik) in Radius Manager + Mikrotik Radius Configuration for RM
RADIUS MANAGER SECTION:Login to Administration Control Panel (ACP) of RM.
Goto NAS / NEW
Fill the required info, Like Mikrotik name, IP address, Secret
As showed in the image below . . .


MIKROTIK SECTION:
Now Login to Mikrotik,
Goto PPP Section
Click on PPP Authenticaiton & Accounting
Click on Use Radius
As showed in the image below . . .
Goto PPP Section
Click on PPP Authenticaiton & Accounting
Click on Use Radius
As showed in the image below . . .


Examples.

.

TIPS:
.

Testing Radius via radtest
First edit/etc/hosts and change the system name to local host ip i.e 127.0.0.1
as showed in the example below. . .

Don’t forget to restart radiusd after making changes to the NAS list!
service radiusd restart
Now issue following commands to test.
1
| radtest user 1111 127.0.0.1 1812 testing123 |

Various Errors & Troubleshooting . . .
↓
1# : IF YOU ARE USING CUSTOM PASSWORD (NOT DEFAULT)
If you see the following error while accessing admin.phpCould not connect to localhost
 If
you are using your own password (other then default password of rm, )
then Make sure your passwords for radius and conntrack hosts are set
correctly in
If
you are using your own password (other then default password of rm, )
then Make sure your passwords for radius and conntrack hosts are set
correctly in
1
2
3
4
5
| /etc/radiusmanager.cfg/var/www/radiusmanager/config/system_cfg.php/usr/local/etc/raddb/sql.conf |
↓
↓
2# :Blank page is showing while accessing admin.php
If you see blank page while accessing admin.php , following could be wrong.a- Your license files are not valid or expired.
b- you have not installed ioncube library correctly.
To test if your license is valid, tail the /var/log/apache2/access.log and error.log , they will show you if your license have issues like expired or invalid dueto mac address restrictions.
To test IONCUBE LIBRARY , Open Terminal and Type
1
| php -v |
root@zaib-desktop:~# php -v
1
2
3
4
| PHP 5.3.2-1ubuntu4.18 with Suhosin-Patch (cli) (built: Sep 12 2012 19:33:42) Copyright (c) 1997-2009 The PHP Group Zend Engine v2.3.0, Copyright (c) 1998-2010 Zend Technologies with the ionCube PHP Loader v4.2.2, Copyright (c) 2002-2012, by ionCube Ltd. |
↓
3# : Incorrect User name & Passowrds in Mikrotik LOG
you are seeing ‘Incorrect user name and password error’ in mikrotik
logs for the users created on RM, then make sure you have defined
correct password in /usr/local/etc/raddb/sql.conf↓
3# : NAS NOT FOUND in RADTEST
If you see NAS NOT FOUND in radtest, please see the heading “Testing Radius via radtest“.If the hostname is different than localhost, (like you have some other hostname name for the machine e.g: radius, then
Edit
/etc/hosts and change the system name to local host ip i.e 127.0.0.1
As showed in the example below . . .
Don’t forget to restart radiusd after making changes to the NAS list!
1
| service radiusd restart |
↓
Part-2 # Complete Backup
DMA provide its own backup script (bash script) Which creates full and differential backup. I have used it and it works really good. But since its copy righted , therefore I am not sharing it here. Just the traditional method I am posting hereCreate backup folder in root /
1
| mkdir /backup |
1
2
3
4
5
| /etc/home/root/usr/local/var/www/var/lib/mysql |
TIP: You can use following commands to copy whole contents and zip it
1
| tar cfz /backup/myrmbackup.tgz /etc /home/root /usr/local /var/www /var/lib/mysql |
Now Create mysql dump of mysql database of DB RADIUS
(which have RM User and other Data)
1
2
| mysqldump -u radius -pradiuspass radius > /backup/db_full_type_current_date.sqlgzip -f /backup/db_full_type_current_date.sql |
Part-3 # Restore Backup
If somehow your server crashes, and you got to re-built it from scratch , you can restore the database using below procedure. (To simplify things, use the same OS)1) Install OS (Same as previous one, in this example Ubuntu)
2) Install RM with the same same config you used for previous installation, e.g: radius db passwords and folders locations
3) Restore all the folders from the backup to there original locations.(backup that taken in part-2 backup part)
4) Now its time to restore mysql radius DB, use the below command to restore DB in mysql.
1
| mysql -u root -prootpasswd radius > db_full_type_current_date.sql |
Now restart your box once time.
If you receive ‘cannot connect to localhost‘ check the passwords in
1
2
| /etc/radiusmanager.cfg/var/www/radiusmanager/config/system_cfg.ph |
1
2
3
4
| mysql -u root -prootpassworduse mysql;UPDATE user SET Password=PASSWORD(your_new_password;) WHERE User='radius';UPDATE user SET Password=PASSWORD(your_new_password;) WHERE User='conntrack'; |
Now restart your box or mysql service
.
Some TiPS For Customizations . . .
↓Howto Configure Email notifications
To configure Email server, edit following,/var/www/radiusmanager/config/system_cfg.php
Goto SMTP section, and modify it as per your local SMTP server/user/domain.
Example:
1
2
3
4
5
6
7
8
9
10
11
| // SMTP definitionsdefine('smtp_relay', '1.2.3.4'); // SMTP relaydefine('smtp_port', 25); // SMTP portdefine('smtp_auth', FALSE); // SMTP authenticationdefine('smtp_user', 'syed.jahanzaib'); // SMTP user namedefine('smtp_psw', 'my_pass'); // SMTP passworddefine('mail_from', 'zaib@xyz.com'); // sender addressdefine('mail_fromname', 'Syed Jahanzaib'); // sender namedefine('mail_newuser', 'zaib@xyz.com'); // self registered new user notificationdefine('mail_localdomain', 'xyz.com'); // default domain name |

↓
HOWTO REPLACE/MODIFY DMASOFTLAB RM LOGO and TEXT !!!
You can Replace/Edit the default DMASOFTLAB logo files. by default, Images are available where you have installed the radiusmanager. Look into the images folder of radiusmanager.For example I installed RM in /var/www/html/radiusmanager. There will be a folder name ‘images’ Look for these files.
dmalogo_small.gif
radmanlogo_small.gif
main1_01.gif
main1_02.gif
main1_03.gif
emailheader.gif
↓
Edit Various Text/headings Show at UCP/ACP
You can also edit the texts/descriptions in language description files in radiusmanager/lang/english folder.look for texts.txt and strings.txt
↓
To Add Logo in Prepaid Cards
You can modify its base image at radiusmanager/lang/english/card folder.look for classic_bg.png and refill_bg.png
More info, you can look at
http://aacable.wordpress.com/2011/07/19/mikrotik-dmasoftlab-rm-squid-zph-linux-bridgecomplete-guide/
To be continued . . .
Allah Hafiz
.
Regard’s
Syed Jahanzaib
aacable [at] hotmail.com
November 26, 2012
DMASOFTLAB Radius Manager SMS Notification Configuration
~ Article by ~
Syed Jahanzaib
DMASOFTLAB Radius Manager have a very nice feature of SMS notification for New Account Activation Message, New Account Activation Verification Code / Password Recovery and many other cool functions that can be done using this feature, however activating it is a bit complex thing to do. As radius manager supplies clickatell HTTP gateway API with there default installation, and I really didn’t wanted to purchase the clickatell account because it would be expensive for any mid-large size network, even a small network wouldn’t want to pay extra amount. So I decided to create my own HTTP gateway which is connected with my GSM Modem. Following is the complete guide on how you can create your own SMS HTTP GATEWAY.
http://aacable.wordpress.com/2012/11/26/howto-configure-your-local-http-gateway-using-kannel-on-ubuntu/Once you have a working HTTP gateway , you can move on to RM configuration section.
Howto configure API to make it work with your Local SMS HTTP gateway.
Login to your RM box using terminal.Open the api.php file by
nano /var/www/radiusmanager/api/api.php
(Change the path if you have RM installed at some other folder)
Now remove all lines and replace them with the following.
(Change the $api_user to match your kannel config)
1
2
3
4
5
6
7
8
9
10
11
12
13
14
15
16
17
18
19
20
21
22
23
24
25
26
27
28
29
30
31
32
33
34
35
36
37
38
39
40
41
42
43
44
45
46
47
48
49
50
51
52
53
54
55
56
57
58
59
60
61
62
63
64
65
66
67
68
69
70
71
72
73
74
75
76
77
78
79
80
81
82
83
84
85
86
87
88
89
90
91
| <?php/******************************************************************************* Name: api_sendsms**** Description: This function is used to send a SMS messages to a mobile phone.** You can call your SMS gateway to send a message to a mobile phone.** The function includes an example code of integrating the** clickatell.com HTTP -> SMS gateway.****
>>>>>>>>>>>>>>>>>>>>>>>>>>>>>>>>>>>>>>>>>>>>>**
Syed Jahanziab > I have changed it to use my local sms gateway
running on KANNEL , Configured on same box where RM is installed and
connected TELTONIKA GSM MODEM with it in VM.**
>>>>>>>>>>>>>>>>>>>>>>>>>>>>>>>>>>>>>>>>>>>>>**** Input: $mode - SMSMODE_ACCVERIFY: send verification code** SMSMODE_WELCOME: send account data** SMSMODE_PSWCODE: send new password activation code** SMSMODE_NEWPSW: send new password** $username - RADIUS user name** $password - RADIUS password** $firstname - first name of user** $lastname - last name of user** $address - postal address of user** $city - city of user** $zip - zip code of user** $country - country of user** $state - state of user** $phone - phone number of user** $mobile - mobile number of user** $email - email address of user** $srvid - associated service id** $verifycode - the verification code to send** $errmsg - pointer to error message returned by the gateway**** Output: True if API succeeded or false*****************************************************************************/function
api_sendsms($mode, $username, $password, $firstname, $lastname,
$address, $city, $zip, $country, $state, $phone, $mobile, $email,
$srvid, $verifycode, &$errmsg){// enter your local sms http gateway credentials here$api_user = "kannel";$api_password = "kannel";switch ($mode){case SMSMODE_ACCVERIFY:$body = "Enter the following verification code in UCP: $verifycode";break;case SMSMODE_WELCOME:$body = "Welcome new user! Your user name is $username, your password is $password";break;case SMSMODE_PSWCODE:$body = "New password activation code: $verifycode";break;case SMSMODE_NEWPSW:$body = "Your new password: $password";break;}// return success (uncomment the following lines in testing environments only)// print $body;// return true;// implement your own SMS gateway in the following block$body = rawurlencode($body);$ch = curl_init();// change the IP and id password in the below line to match your local config. syed jahanzaibcurl_setopt($ch, CURLOPT_URL, "http://101.11.11.250:13013/cgi-bin/sendsms?user=$api_user&password=$api_password&api_id=$api_id&to=$mobile&text=$body");curl_setopt($ch, CURLOPT_RETURNTRANSFER, 1);$res = curl_exec($ch);curl_close($ch);// uncomment this to see the result from clickatell.com HTTP->SMS gateway// print $res;if (substr($res, 0 , 4) == "ERR:"){$errmsg = $res;return false;}// SMS sent successfullyreturn true;}?> |
.
Howto send Account Expiry Warning to User via email
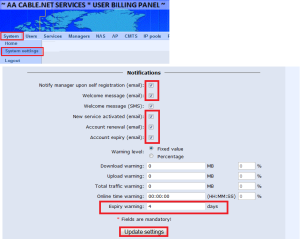
Logon to RM Admin Panel,Goto System/ System Settings
At the bottom of the page, You will see Notification’s section.
At the Expiry warning: Type the number of days you want RM to send account expiry warning before the account expires.
Also tick on all related options as showed in the image.
As showed in the image below . . .

.
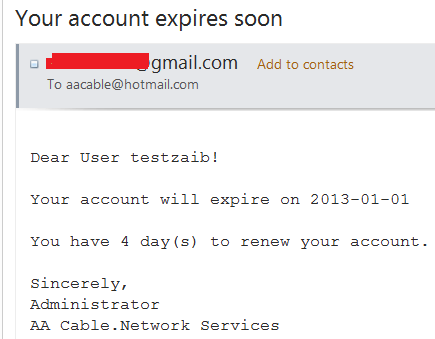
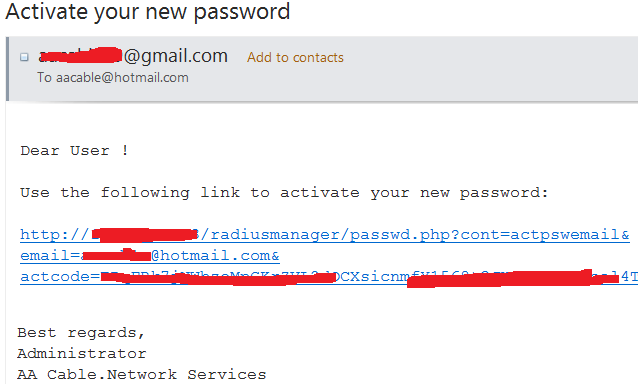
Once the account reaches near its expiry, user will receive email like below . . .

Howto Recover User Password via FORGOT PASSWORD link at user.php (ver 4.x or above)
User can recover his forgotten password using Forgot my password at user.phpFor Example
 .
.
After submission the mobile number, user will receive A code on his mobile number (If he have defined valid number while registering the account. Then after entering the code in the below screen, he will receive new password.
As showed in the image below . . .


.
.
Regard’s
Syed Jahanzaib
November 20, 2012
Dmasoftlab Radius Manager: Different Bandwidth for Day & Night

Scenario #
We have created 512k service for the users, In late night, our bandwidth is usually not much used because only limited number of users uses the internet in late timings. Therefore we want to increase users bandwidth from 512k to 1mb automatically in night 12:00am till 12:00pmwe will divide this article in three sections.
1) Mikrotik Section (For Adding API):
2) Radius Manager Section (For Adding API):
3) Adding Service & Plan in Radius Manager:
Mikrotik Section (For Adding API):
We have to first configure API both in Mikrotik & DMASOFTLAB RM Panel.Goto IP > Services & enable API service.
As showed in the image below . . .

.
.
Now create API user so it can be used by RM to connect to MT.
Goto SYSTEM > USERS and add new user by click on + icon.
User name = api
Password = api (or anything else)
As showed in the image below . . .

.
Radius Manager Section (For Adding API):
Open Radius Manager Admin Panel,Goto NAS > LIST NAS
Select your Mikrotik NAS
Click on ENABLE MIKROTIK API
Define API user name & Password that we added in mikrotik section.
As showed in the image below . . .

.

Adding Service & Plan in Radius Manager:
First Create a normal service profile (512k) using Radius Manager Admin Panel.As showed in the image below . . .
 .
..
.
.
Now Click on EDIT button on Special Bandwidth Periods section at the bottom of the page . . .
As showed in the image below . . .

.
.
.
.
Now click on NEW PERIOD
As showed in the image below . . .

.
.
.
.
Enter your desired timings (in this example I used night 12 till day 12) in which you want to allow excess/reduced bandwidth. After done, click on ADD PERIOD
As showed in the image below . . .

.
.
.
.
After You see the new Special Bandwidth Periods close this popup window.
As showed in the image below . . .
 .
..
.
.
Click on the UPDATE SERVICE on main service window.
Now create any user and test it by modifying timings (for test or quick results)
As showed in the image below . . .
 .
. .
..
Regard’s
Syed Jahanzaib
DMASOFTLAB RM 4.0.4 [Only]: Email Notifications for various events
DMASOFTLAB Radius Manager 4.0.4 have interesting feature of email notifications for various events like account expiry warning, account renewal notification, send custom email to all users, password recovery via email verification code and many more. By default RM uses authentication less smtp server of your ISP, but in most cases Email sent from the RM box arrives in JUNK/SPAM folder in users email box, and sometimes bounces back due to black listed IP’s . This happens very frequent in my country as we widely use national telecom company internet service called PTCL, whose ip’s usually get blocked by many email services. Therefore I created this method by installing SENDMAIL in RM box, and uses my GMAIL account as SENDMAIL SMTP RELAY. This way RM sends mail via localhost, which uses valid GMAIL account to send email and email arrives in users INBOX directly
First we need to configure sendmail with gmail smtp relay. Use the below link to install.
http://aacable.wordpress.com/2012/12/27/howto-configure-gmail-as-sendmail-relay-d-also-can-be-used-with-rm-to-send-email-notifications/
After you have verified your smtp server is working fine by sending test email to your Hotmail/gmail/yahoo mail account.
You need to edit the following files.
/etc/radiusmanager.cfg
/var/www/radiusmanager/config/system_cfg.php
SAMPLES:
/etc/radiusmanager.cfg
1
2
3
4
| smtp_relay localhost ; smtp relaymail_from GMAILID@gmail.com ; email sender addressmail_reply GMAILID@gmail.com ; email reply adddressmail_localdomain 127.0.0.1 ; email local domain |
/var/www/radiusmanager/config/system_cfg.php
1
2
3
4
5
6
| define("smtp_relay", "localhost"); // SMTP relaydefine("mail_from", "GMAILID@gmail.com"); // warning email senderdefine("mail_reply", "GMAILID@gmail.com"); // warning email return pathdefine("mail_preview", "GMAILID@gmail.com"); // preview user of mass maildefine("mail_newuser", "GMAILID@gmail.com"); // self registered new user notificationdefine("mail_localdomain", "127.0.0.1"); // default domain name |
Now Open RM ACP (Administrator Control Panel) ,
Goto SYSTEM > SYSTEM SETTINGS
& check the following settings.
As showed in the image below . . .
 .
.Now Administrator & user will receive various Email Notifications.
As showed in the images below . . .
.
Account Expiry before 5 Days (days are configurable via admin panel / home ,settings)
.
.
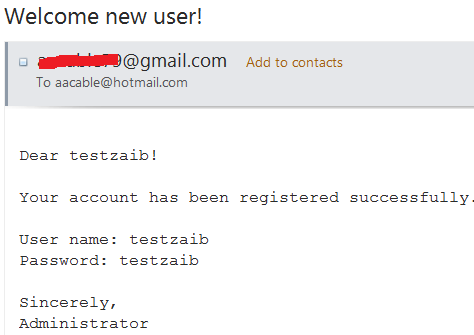
Welcome Message for newly registered users
 .
..
Recover Password by Email
.
.
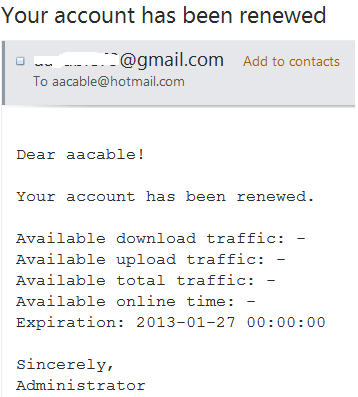
Account Renewed Notification
.
Note: Please check JUNK email folder, because sometimes email gets in JUNK folder if your ISP ips are listed in any dns black list as spam. Mark it safe so future mails comes into INBOX directly.
To edit various Texts appeared in the notifications, you can edit following files.
/var/www/radiusmanager/lang/English/
mailaccrenewfail_tpl.txt
mailnewpsw_tpl.txt
mailwarnexp_tpl.txt
reg_terms.txt
mailforgotpsw_tpl.txt
mailselfreg_tpl.txt
mailwarntraff_tpl.txt
strings.txt
mailaccrenewed_tpl.txt
mailiasreg_tpl.txt
mailsrvchg_tpl.txt
mailwelcomeuser_tpl.txt
texts.txt
/var/www/radiusmanager/
userlogin_tpl.htm
-
.
Regard’s
Syed Jahanzaib
Dmasoftlab Radius Manager: Quota Base Service

Scenario # 1 = 1 mbps Speed limit, Fix Monthly Quota Base Service with Daily 300 Mb Download Quota limit, if the user cross the daily quota limit, his service will shift to lower speed profile i.e 256k for the current day, after date change, the user profile will revert back to 1mb.
Details:
Bandwidth Allowed = 1 mb
User Expiry = 1 Month
(after one month, user accounts will expire)
User Monthly Traffic Quota = 1 gbps
(after consuming 1gb total, account will expire)
User Daily Traffic Quota = 300mb
(After downloading 300mb in a day, user service will be changed to NEXT DAILY SERVICE of less speed i.e 256k daily service for the rest of the day. after the date change, user service will be returned to normal i.e 1mb)
Ok here we go . . .

First Create New Service in RM using the following screenshots.
.


===========================================================================
Now create another new service using following screenshots.

.
That’s it. Now When the user will be registered using the user.php, he will first see the below account details.

.
After the user refills his account and purchase credit via user panel, his ID will be ACTIVE with the following info.
.

.
After the user reaches above 300 MB in a single day, his service will be switched to NEXT DAILY SERVICE of zaib-256k-daily.
NOTE: The Service change will not be implemented on the FLY, the user hotspot/pppoe session will be auto disconnected by Mikrotik on radius request, and when it will reconnect , the user will be using 256k service profile.
.
Regard’s
Syed Jahanzaib
February 14, 2012
DMASOFTLAB Radius Manager V4 Released :D
At last, RM v4 have been released with good features, specially SMS for welcome/Expiry/warning messages.
Complete Features added in v4 are as follows.
ACP:
http://radmandemo.dmasoftlab.com/admin.php
UCP:
http://radmandemo.dmasoftlab.com
More informations:
http://www.dmasoftlab.com/cont/radman
*** v 4.0.0 *** 2012-02-13 ***
NEW FEATURES:
-support for DHCP based cable modem accounts (DOCSIS)
-RADIUS IP pool support
-the default mobile number is displayed upon verifying a self registered account
-ACP list users more sortable columns
-contract id search option
-Hotspot MAC and CM users can purchase credits in UCP
-already used email address or SMS number is not allowed in self registration
-already used SMS number cannot be used for account verification
-notify admin in email when a new user is registered
-self registration welcome email with username / password
-self registration welcome SMS with username / password
-notify admin in email when a new IAS is registered
-IAS welcome email (username / psw)
-IAS welcome SMS (username / psw)
-send email upon adding credits (ACP, UCP)
-password recovery through SMS, email
-automatic MAC binding option for regular, card and IAS accounts
-write off option for managers
-PIN prefix field in card generator
-carry over remaining credits to next month (auto renew option)
-VAT id as optional self registration mandatory field
-remember last selected account type in new user form
-remember last selection in search invoices form
-account type selector in find users form
-option for disabling the grouping of decimals on invoice form
-filter postpaid payment status in list invoices form
-search for active / expired users, cards and IAS accounts
-search for used / unused accounts
-find users form remembers last selected checkbox status
-list and search refill cards
-the default sim-use value can be specified in system_cfg.php (useful for pfSense)
-definable additional traffic unit
-search invoice by account owner
-card print pdf series number
-online RADIUS users list show groups
-wireless signal monitoring
-enhanced online RADIUS users view
-geolocation field in edit user form
-CTS access permission flag
-enhanced traffic summary view
-new service flag: ignore static IP
-default sim-use is definable for self registered users
BUGFIXES:
-Hotspot MAC user uses blank password for NAS authentication and regular password for UCP
-disconnect daily quota enabled users every day at midnight
-authorize.net IAS purchase problem fixed
-PayPal Express Checkout total price decimal problem fixed
-PayPal Express Checkout security hole fixed
-special characters are allowed in NAS secret
-data rate for pfSense sent in bps instead of kpbs
-logout next service user when refilled in UCP
-automatically disconnect renewed postpaid users to return to the original service if next service is used
-scheduled service change logs out the user (POD)
-enhanched counters for available online time (no more ~800 hours limit)
-the fallback language (English) is used only if selected language is unavailable
-search invoices bug fixed
-traffic summary own users bug fixed
-special pricing periods 2 GB limit bug fixed
-IP address sort order problem fixed
-admin can list hidden services
Regard’s
SYED JAHANZAIB
November 16, 2011
DMASOFTLAB Radius Manager Backup Script !

 Following is an Complete Script for DMASOFTLAB Radius Manager [purchased ver].
It creates Full and Incremental Backup of all configuration files of RM & mysql database (radius).
Regard’s
Syed Jahanzaib
(:~ SCRIPT REMOVED ON REQUEST OF Mr.VIKTOR / DMASOFTLAB ~:)
Email ME  OR visit
http://aacable.wordpress.com/2012/11/30/dmasoftlab-radius-manager-install-backup-restore-short-reference-guide/
http://aacable.wordpress.com/2012/11/30/dmasoftlab-radius-manager-install-backup-restore-short-reference-guide/
.
.
Regard’s
Syed Jahanzaib
Syed Jahanzaib
July 19, 2011
Howto setup Mini ISP using Mikrotik as PPPoE Server + DMASOFTLAB Radius Manager Scratch Card Billing System+ Linux Transparent Firewall Bridge + Ubuntu SQUID 2.7 Proxy Server
Following is a my personnel experience / Guide on Howto configure a mini ISP type Network using following scenario . . . .

Recently I was contacted by a friend who was really passionate in starting a mini-ISP type network setup for about 3000 users in the interior area of city. (soon it may expand up to 5000+
users). He asked my help to setup a scratch card base fully automatic
system where user purchase scratch card, & using User self care
portal web site, user may create his new ID or refresh his previous ID
or change the service package according to the card package offers. I
had previously setup this kind of scenario in a cable.net environment
using Mikrotik built-in radius server called ‘User Manager’, but it have very limited basic features and all it can offer was a pre-paid
type option and it doesn’t have many accounting features. So I thought I
should give a try to more rich feature radius server and after a lot of
googling i decided to go with (FREERADIUS base ) DMASOFTLAB RADIUS MANAGER. A very famous radius server with all the option that a mini-ISP would required at unbelievably low price.
The hardware that I have used for this setup.
*Main Mikrotik = v4.17 x86 / Xeon 3.6Ghz Dual / 2 GB Ram / WD 500 GB Sata Hdd , This MT is serving as a PPPoE Server + NAT + bandwidth shaping. It also redirects HTTP traffic to Proxy server.
* Mikrotik RB750 = Just for HOTSPOT to redirect users to self care portal.
(This can be done on Main MT also, but I prefer it this way)
* Radius Server = DMASoftlab RM v3.9 installed on Fedora v10 / Xeon 3.6Ghz Dual / 4 GB Ram / WD 500 GB x2 Sata Hdd
* SQUID PROXY GW = SQUID v2.7 on UBUNTU Karmic Koala v9.10 / Xeon 3.6Ghz Dual / 8 GB Ram / WD 500 GB x3 SATA HDD (2 HDD reserved for Cache), This server acts as a proxy + Gateway machine for the Mikrotik, It also do URL Filtering blocking ads, it also have ZPH enabled so content available in squid cache should be downloaded at full speed (without package limitation) at user end.
* Linux Transparent BRIDGE firewall + DHCP + DNS + MRTG + WEB Server on FEDORA V10 / Xeon 3.6Ghz Dual / 4 GB Ram / WD 500 GB SATA HDD, This server sits between Mikrotik and Users , filtering unwanted traffic, ports and do some other stuff like lightweight DNSMASQ DNS Server, DHCP server providing ips to users , Web Site with MRTG , Psychostats ranking system for Counter Strike Game, Server Monitoring Scripts and Alerts, PHPBB Forums for Users, and some other cool stuff. DNS+DHCP is hosted on this server to minimize load on main mikrotik machine, alos this machine filters unwanted traffic from passing by to main mikrotik.
In this setup , I have configured HOTSPOT on extra RB750 only to redirect user to my advertisement page, where he is informed that he is not logged in via dialer, either create / refresh his ID from RM User Self Care Portal, or if he already have an id, connect it via dialer. I don’t prefer HotSpot authentication due to various security reasons, mainly due to I had a very bad experience having HOTSPOT hit by ARP-POISONING and many virus flooder that requires default gateway.
When user first login , his PC MAC address is binded with his ID to prevent accessing it from different pcs. Multiple session of same ID is NOT allowed , I provide user with scratch card (with refill code) , which he can use to refill his account according to card amount/package from RM User self care portal. RM demo can be viewed at http://www.dmasoftlab.com/cont/radman
When users with pppoe dialer tries to connect to main Mikrotik, MT verifies its credentials by asking Radius Server for the account validity, if the ID is valid, user connects okay and can use internet , otherwise he gets disconnected. When the User account is expired, he still can login via dialer, but then he is redirect to my local web server page where he is informed that his account is expired and he should visit billing.local page to renew his account using the card.
Please find along with attachment is my Network Diagram (This was initially designed, I made few changes afterward, I removed FTP from MT DMZ to user subnet lan to avoid load on MT , I moved ftp OS from windows to Linux and integrate it with radius authentication using APACHE.
Some other entertainment services that I setup here were:
2 FTP Media Sharing Servers ( 4 TB of data ) based on Linux Apache with radius as back-end authentication
2 Live TV Channel streaming over LAN using VLC Media Player Broadcasting
1 Counter Strike 1.6 Dedicated Server with Psychostats Ranking System and adminmod/amxmod
1 Web Server (Ubunut) hosting site u-dear . com , an entertainment portal and hosting other features. It also features monitoring system with MRTG / SMS Alerts via attached Mobile.
About RM: Radius Manager uses a nice web interface for administering the users and the whole system (traffic accounting, tracking of online users, display statistics, maintenance ,account management etc.) and to add that DMASoftlab customer support guys (specially Mr. Viktor.K) have excellent support and respond instantly even to the dumbest of questions. It is real value for money especially for those who do not have big budgets.
We will distribute this article in following sections.
1) MIKROTIK ROUTEROS CONFIGURATION [x86 v4.17]
2) SQUID SERVER CONFIGURATION [using UBUNTU 9.1]
3) RADIUS MANGER CONFIGURATION [using FEDORA 10] + Adding Service Plans & Generating Refill Cards
4) LINUX TRANSPARENT FIREWALL BRIDGE CONFIGURATION [using FEDORA 10]
5) USER / CLIENT SIDE CONFIGURATION [using WINXP/WIN7]
I will focus only Radius Manager configuration here because it was a little tricky to setup at the first time, Rest of configs like mikrotik , squid and others are well descriebd in my other articles which i have mentioned in this post)
Now we will start from Mikrotik
1) MIKROTIK ROUTEROS CONFIGURATION [x86 v4.17]
In this scenario , Mikrotik have FOUR interface card. Description is as follows1) LAN interface = Connected with user switch
2) WAN interface = Connected with ISP WAN
3) DMZ interface = Connected with FTP Server’s Switch or via Crossover cable if there is only single ftp server.
4) Proxy interface = Connected with SQUID PROXY Server via Crossover cable
For various reasons, I am not sharing exact Mikrotik Configuration. Just a basic modified version.
1
2
3
4
5
6
7
8
9
10
11
12
13
14
15
16
17
18
19
20
21
22
23
24
25
26
27
28
29
30
31
32
33
34
35
36
37
38
39
40
41
42
43
44
45
46
47
48
49
50
51
52
53
54
55
56
57
58
59
60
61
62
63
64
65
66
67
68
69
70
71
72
73
74
75
76
77
78
79
80
81
82
83
84
85
86
87
88
89
90
91
92
93
94
95
96
97
98
99
100
101
102
103
104
105
106
107
108
109
110
111
112
113
114
115
116
117
118
119
120
121
122
123
124
125
126
127
128
129
130
131
132
133
134
135
136
137
138
139
140
141
142
143
144
145
146
147
148
149
150
151
152
153
154
155
156
157
158
159
160
161
162
163
164
165
166
167
168
169
170
171
172
173
174
175
176
177
178
179
180
181
182
183
184
185
186
187
188
189
190
191
192
193
194
195
196
197
198
199
200
201
202
203
204
205
206
207
208
209
210
211
212
213
214
215
216
217
218
219
220
221
222
223
224
225
| # apr/01/2006 02:35:02 by RouterOS 4.17# software id =#/interface ethernetset 0 arp=enabled auto-negotiation=yes cable-settings=default comment="" \disable-running-check=yes disabled=no full-duplex=yes mac-address=\00:0E:0C:06:7C:96 mtu=1500 name=lan speed=100Mbpsset 1 arp=enabled auto-negotiation=yes cable-settings=default comment="" \disable-running-check=yes disabled=no full-duplex=yes mac-address=\00:0E:0C:06:5B:BE mtu=1500 name=proxy speed=100Mbpsset 2 arp=enabled auto-negotiation=yes cable-settings=default comment="" \disable-running-check=yes disabled=no full-duplex=yes mac-address=\00:13:72:93:4B:C0 mtu=1500 name=wan speed=100Mbpsset 3 arp=enabled auto-negotiation=yes cable-settings=default comment="" \disable-running-check=yes disabled=no full-duplex=yes mac-address=\00:0E:0C:06:62:54 mtu=1500 name=dmz speed=100Mbps# Setting IP Addresses for interfaces/ip addressadd address=10.10.0.1/8 broadcast=10.255.255.255 comment="" disabled=no \interface=lan network=10.0.0.0add address=111.1111.111.111/29 broadcast=111.1111.111.111 comment="" disabled=no \interface=wan network=203.101.173.0add address=192.168.20.1/24 broadcast=192.168.20.255 comment="" disabled=no \interface=proxy network=192.168.20.0add address=192.168.2.1/24 broadcast=192.168.2.255 comment="" disabled=no \interface=dmz network=192.168.2.0# Adding PPPoE Profile , Change DNS accordingly to your network/ppp profileset default change-tcp-mss=default comment="" dns-server=10.10.0.1 name=\default only-one=default use-compression=default use-encryption=default \use-vj-compression=defaultadd change-tcp-mss=default comment="" dns-server=192.168.20.2 local-address=\10.10.0.1 name=ppoe-profile only-one=default remote-address=256k \use-compression=default use-encryption=default use-vj-compression=defaultset default-encryption change-tcp-mss=yes comment="" name=default-encryption \only-one=default use-compression=default use-encryption=yes \use-vj-compression=default# Setting PPPoE Server configuration/interface pppoe-server serveradd authentication=pap default-profile=ppoe-profile disabled=no interface=lan \keepalive-timeout=10 max-mru=1480 max-mtu=1480 max-sessions=1 mrru=\disabled one-session-per-host=yes service-name=glassline1add authentication=pap,chap,mschap1,mschap2 default-profile=ppoe-profile \disabled=yes interface=lan keepalive-timeout=10 max-mru=1480 max-mtu=1480 \max-sessions=1 mrru=disabled one-session-per-host=yes service-name=\service1# Setting DNS Server for LOCAL LAN users/ip dnsset allow-remote-requests=yes cache-max-ttl=1w cache-size=250000KiB \max-udp-packet-size=512 servers=221.132.112.8,8.8.8.8# User gets ip from these pools as per there packages, Just to locate and for some record purpose./ip pooladd name=256k ranges=172.16.2.1-172.16.4.250add name=512k ranges=172.16.5.1-172.16.7.250add name=1mb ranges=172.16.8.1-172.16.9.250add name=2mb ranges=172.16.10.1-172.16.10.250add name=expired-pool ranges=172.16.99.1-172.16.101.250/queue typeset default kind=pfifo name=default pfifo-limit=50set ethernet-default kind=pfifo name=ethernet-default pfifo-limit=50set wireless-default kind=sfq name=wireless-default sfq-allot=1514 \sfq-perturb=5set synchronous-default kind=red name=synchronous-default red-avg-packet=1000 \red-burst=20 red-limit=60 red-max-threshold=50 red-min-threshold=10set hotspot-default kind=sfq name=hotspot-default sfq-allot=1514 sfq-perturb=\5add kind=sfq name=exempt sfq-allot=1514 sfq-perturb=5set default-small kind=pfifo name=default-small pfifo-limit=10# Unlimited Speed for CACHE content to be delivered to users at LAN speed regardless of there pcakge./queue simpleadd burst-limit=0/0 burst-threshold=0/0 burst-time=0s/0s comment="" \direction=both disabled=no dst-address=0.0.0.0/0 interface=all limit-at=\0/0 max-limit=0/0 name=Proxy-HITTING packet-marks=proxy-hit parent=none \priority=1 queue=default-small/default-small total-queue=default-small## Unlimited Speed for CACHE content to be delivered to users at LAN speed regardless of there pcakge.## Unlimited Speed for FTP SERVER's in DMZ/queue treeadd burst-limit=0 burst-threshold=0 burst-time=0s disabled=no limit-at=0 \max-limit=1G name=CACHE-HIT packet-mark=proxy-hit parent=global-out \priority=1 queue=defaultadd burst-limit=0 burst-threshold=0 burst-time=0s disabled=no limit-at=0 \max-limit=1G name=pmark packet-mark=proxy-hit parent=global-out priority=\1 queue=defaultadd burst-limit=0 burst-threshold=0 burst-time=0s disabled=no limit-at=0 \max-limit=1G name=exempt-up packet-mark=exempt-up parent=global-in \priority=8 queue=exemptadd burst-limit=0 burst-threshold=0 burst-time=0s disabled=no limit-at=0 \max-limit=1G name=exempt-down packet-mark=exempt-down parent=global-out \priority=8 queue=exempt# For SNMP Monitoring/snmpset contact=aacable@hotmail.com enabled=yes engine-boots=33 engine-id="" location="Glassline Nawabshah" time-window=15 \trap-sink=0.0.0.0 trap-version=1/snmp communityset secret_name address=0.0.0.0/0 authentication-password="" authentication-protocol=MD5 encryption-password="" \encryption-protocol=DES name=gl read-access=yes security=none write-access=no# Logging features, I used to have 14 lines, with all necessary info written to DISK for record purpose./system logging actionset memory memory-lines=100 memory-stop-on-full=no name=memory target=memoryset disk disk-file-count=14 disk-file-name=GLMT-log disk-lines-per-file=10000 disk-stop-on-full=no name=disk target=diskset echo name=echo remember=no target=echo/system loggingadd action=memory disabled=no prefix="" topics=info,!firewalladd action=echo disabled=no prefix="" topics=erroradd action=echo disabled=no prefix="" topics=warningadd action=echo disabled=no prefix="" topics=criticaladd action=remote disabled=no prefix="" topics=firewalladd action=disk disabled=no prefix="" topics=pppoe,ppp,infoadd action=disk disabled=no prefix="" topics=criticaladd action=disk disabled=no prefix="" topics=system,infoadd action=disk disabled=no prefix="" topics=pppoe,info# Adding rules to block Virus and adding some security/ip firewall filteradd action=reject chain=forward comment="" disabled=yes dst-address=\!192.168.20.2 reject-with=icmp-admin-prohibited src-address=\172.16.99.1-172.16.101.250add action=accept chain=input comment="Accept established connections" \connection-state=established disabled=noadd action=accept chain=input comment="Accept related connections" \connection-state=related disabled=noadd action=drop chain=input comment="Drop invalid connections" \connection-state=invalid disabled=noadd action=accept chain=input comment=UDP disabled=no protocol=udpadd action=drop chain=virus comment="Drop Blaster Worm" disabled=no dst-port=\135-139 protocol=tcpadd action=drop chain=virus comment="Drop Messenger Worm" disabled=no \dst-port=135-139 protocol=udpadd action=drop chain=virus comment="Drop Blaster Worm" disabled=no dst-port=\445 protocol=tcpadd action=drop chain=virus comment="Drop Blaster Worm" disabled=no dst-port=\445 protocol=udpadd action=add-src-to-address-list address-list="port scanners" \address-list-timeout=2w chain=input comment="Port scanners to list " \disabled=no protocol=tcp psd=21,3s,3,1add action=add-src-to-address-list address-list="port scanners" \address-list-timeout=2w chain=input comment="NMAP FIN Stealth scan" \disabled=no protocol=tcp tcp-flags=fin,!syn,!rst,!psh,!ack,!urgadd action=add-src-to-address-list address-list="port scanners" \address-list-timeout=2w chain=input comment="SYN/FIN scan" disabled=no \protocol=tcp tcp-flags=fin,synadd action=add-src-to-address-list address-list="port scanners" \address-list-timeout=2w chain=input comment="SYN/RST scan" disabled=no \protocol=tcp tcp-flags=syn,rstadd action=add-src-to-address-list address-list="port scanners" \address-list-timeout=2w chain=input comment="FIN/PSH/URG scan" disabled=\no protocol=tcp tcp-flags=fin,psh,urg,!syn,!rst,!ackadd action=add-src-to-address-list address-list="port scanners" \address-list-timeout=2w chain=input comment="ALL/ALL scan" disabled=no \protocol=tcp tcp-flags=fin,syn,rst,psh,ack,urgadd action=add-src-to-address-list address-list="port scanners" \address-list-timeout=2w chain=input comment="NMAP NULL scan" disabled=no \protocol=tcp tcp-flags=!fin,!syn,!rst,!psh,!ack,!urgadd action=drop chain=input comment="dropping port scanners" disabled=no \src-address-list="port scanners"add action=drop chain=input comment="drop ftp brute forcers" disabled=no \dst-port=21 protocol=tcp src-address-list=ftp_blacklistadd action=drop chain=input comment="DROP PING REQUEST - SECURITY" disabled=\no protocol=icmpadd action=accept chain=input comment="" disabled=no dst-port=\21,22,23,80,443,8291 protocol=tcp src-address-list=management-serversadd action=drop chain=input comment="" disabled=yes dst-port=\21,22,23,443,8291 protocol=tcp# Marking various packets like http, cache content, ftp etc . . ./ip firewall mangleadd action=mark-packet chain=prerouting comment=squid disabled=no dscp=12 \new-packet-mark=proxy-hit passthrough=noadd action=mark-packet chain=postrouting comment="" disabled=no dscp=12 \new-packet-mark=proxy-hit passthrough=noadd action=mark-routing chain=prerouting comment="" disabled=no dst-port=80 \new-routing-mark=http passthrough=yes protocol=tcpadd action=mark-packet chain=prerouting comment="UNLIMITED SPEED FOR FTP" disabled=no dst-address=\192.168.2.0/24 new-packet-mark=exempt-up passthrough=yes src-address=\172.16.0.0/16add action=mark-packet chain=postrouting comment="UNLIMITED SPEED FOR FTP" disabled=no dst-address=\172.16.0.0/16 new-packet-mark=exempt-down passthrough=yes src-address=\192.168.2.0/24# NAT rule for pppoe users pool only/ip firewall natadd action=accept chain=srcnat comment="ACCEPT PORT 80 FOR ROUTING" disabled=no dst-port=80 protocol=tcpadd action=masquerade chain=srcnat comment="NAT FOR 172.16.0.0/16 SERIES" disabled=no out-interface=wan src-address=\172.16.0.0/16# Adding default route for HTTP to be routred to SQUID and all other traffic to Mikrotik WAN# Also adding route for DMZ / FTP/ip routeadd comment="" disabled=no distance=1 dst-address=0.0.0.0/0 gateway=\192.168.20.2 routing-mark=http scope=30 target-scope=10add comment="" disabled=yes distance=1 dst-address=0.0.0.0/0 gateway=\192.168.2.1 routing-mark=ftp scope=30 target-scope=10add comment="" disabled=no distance=1 dst-address=0.0.0.0/0 gateway=\111.1111.111.111 scope=30 target-scope=10# Adding RADIUS SUPPORT/ppp aaaset accounting=yes interim-update=1m use-radius=yes/radiusadd accounting-backup=no accounting-port=1813 address=10.10.0.2 \authentication-port=1812 called-id="" comment="" disabled=no domain="" \realm="" secret=immiarro9 service=ppp timeout=2s/radius incomingset accept=yes port=1700/system loggingadd action=memory disabled=no prefix="" topics=infoadd action=memory disabled=no prefix="" topics=erroradd action=memory disabled=no prefix="" topics=warningadd action=echo disabled=no prefix="" topics=criticaladd action=disk disabled=no prefix="" topics=infoadd action=disk disabled=no prefix="" topics=warning |
http://aacable.wordpress.com/2011/08/09/mikrotik-pppoe-server-with-user-manager-pre-paid-billing-system/
For User ip redirection to SQUID configuration in Mikrotik, Please read the following post.
http://aacable.wordpress.com/2011/07/21/mikrotik-howto-redirect-http-traffic-to-squid-with-original-source-client-ip/
For FTP queue exemption in Mikrotik, Please read the following post.
http://aacable.wordpress.com/2011/08/04/howto-exempt-rate-limit-for-ftp-server-behind-mt-dmz-in-placment-of-dynamic-queues/
2) SQUID SERVER CONFIGURATION [using UBUNTU 9.1 Karmic Koala]
SQUID Server have two lan cards.One is connected with ISP WAN
Other is connected directly with Mikrotik with cross over cable.
I used the following script to share the basic internet. just copy all contents in any file , for example /etc/squid/fw.sh
and paste the following content in it.
1
2
3
4
5
6
7
8
9
10
11
12
13
14
15
16
17
18
19
20
21
22
23
24
25
26
27
28
29
30
31
32
33
34
35
36
37
38
39
40
41
42
43
44
45
46
47
48
49
50
51
| #!/bin/sh# ------------------------------------------------------------------------------------# (c) 2006, nixCraft under GNU/GPL v2.0+# -------------------------------------------------------------------------------------# squid server IPSQUID_SERVER="192.168.20.2"# Interface connected to InternetINTERNET="eth1"# Interface connected to LANLAN_IN="eth0"# Squid portSQUID_PORT="8080"# DO NOT MODIFY BELOW# Clean old firewalliptables -Fiptables -Xiptables -t nat -Fiptables -t nat -Xiptables -t mangle -Fiptables -t mangle -X# Load IPTABLES modules for NAT and IP conntrack supportmodprobe ip_conntrackmodprobe ip_conntrack_ftp# For win xp ftp clientmodprobe ip_nat_ftpecho 1 > /proc/sys/net/ipv4/ip_forward# Setting default filter policy#iptables -P INPUT DROPiptables -P OUTPUT ACCEPT# Unlimited access to loop backiptables -A INPUT -i lo -j ACCEPTiptables -A OUTPUT -o lo -j ACCEPT# Allow UDP, DNS and Passive FTPiptables -A INPUT -i $INTERNET -m state --state ESTABLISHED,RELATED -j ACCEPT# set this system as a router for Rest of LANiptables --table nat --append POSTROUTING --out-interface $INTERNET -j MASQUERADEiptables --append FORWARD --in-interface $LAN_IN -j ACCEPT# unlimited access to LANiptables -A INPUT -i $LAN_IN -j ACCEPTiptables -A OUTPUT -o $LAN_IN -j ACCEPT# DNAT port 80 request comming from LAN systems to squid 8080 ($SQUID_PORT) aka transparent proxyiptables -t nat -A PREROUTING -i $LAN_IN -p tcp --dport 80 -j DNAT --to $SQUID_SERVER:$SQUID_PORT# if it is same systemiptables -t nat -A PREROUTING -i $INTERNET -p tcp --dport 80 -j REDIRECT --to-port $SQUID_PORT# DROP everything and Log itiptables -A INPUT -j LOG#iptables -A INPUT -j DROProute add -net 172.16.0.0 netmask 255.255.0.0 gw 192.168.20.1 dev eth0route add -net 10.0.0.0 netmask 255.0.0.0 gw 192.168.20.1 dev eth0 |
For fine tunned squid.conf , I used the following modified version.
/etc/squid/squid.conf withe the following data.
1
2
3
4
5
6
7
8
9
10
11
12
13
14
15
16
17
18
19
20
21
22
23
24
25
26
27
28
29
30
31
32
33
34
35
36
37
38
39
40
41
42
43
44
45
46
47
48
49
50
51
52
53
54
55
56
57
58
59
60
61
62
63
64
65
66
67
68
69
70
71
72
73
74
75
76
77
78
79
80
81
82
83
84
85
86
87
88
89
90
91
92
93
94
95
96
97
98
99
100
101
102
103
104
105
106
107
108
109
110
111
112
113
114
115
116
117
118
119
120
121
122
123
124
125
126
127
128
129
130
131
132
133
134
135
136
137
138
139
140
141
142
143
144
145
146
147
148
149
150
151
152
153
154
155
156
157
158
159
160
161
162
163
164
165
166
167
168
169
170
171
172
173
174
175
176
177
178
179
180
181
182
183
184
185
186
187
188
189
190
191
192
193
194
195
196
197
198
199
200
201
202
203
204
205
206
207
208
209
210
211
212
213
214
215
216
217
218
219
220
221
222
223
224
225
226
227
228
229
230
231
232
233
234
235
236
237
238
239
240
241
242
243
244
245
246
247
248
249
250
251
| # SQUID 2.7 CONFIG FILE# By - Syed Jahanzaib</pre># Email: aacable@hotmail.com# Web : http://aacable.wordpress.com# PORT and Transparent Optionhttp_port 8080 transparentserver_http11 onicp_port 0# Cache Directory , modify it according to your system.# but first create directory in root by# mkdir /cache1# chown proxy:proxy /cache1# [for ubuntu user is proxy, in Fedora user is SQUID]# I have set 200 GB for caching, Adjust it according to your need.# My recommendation is to have one cache_dir per drive. Syed Jahanzaibstore_dir_select_algorithm round-robincache_dir aufs /cache1 200000 16 256#cache_dir ufs /mnt/hdd2/cache2 200000 16 256 # If you have secondary HDDmemory_replacement_policy heap GDSFcache_replacement_policy heap GDSF# If you want to enable DATE time n SQUID Logs,use followingemulate_httpd_log onlogformat squid %tl %6tr %>a %Ss/%03Hs %<st %rm %ru %un %Sh/%<A %mtlog_fqdn off# How much days to keep users access web logs# You need to rotate your log files with a cron job. For example:# 0 0 * * * /usr/local/squid/bin/squid -k rotatelogfile_rotate 14debug_options ALL,1cache_access_log /var/log/squid/access.logcache_log nonecache_store_log none#acl adsites dstdomain url_regex "/etc/squid/adslist.txt"#http_access deny adsites#deny_info http://192.168.6.1/psb.htm adsites#I used DNSAMSQ service for fast dns resolving#so install by using "apt-get install dnsmasq" firstdns_nameservers 127.0.0.1 221.132.112.8ftp_user anonymous@ftp_list_width 32ftp_passive onftp_sanitycheck on#ACL Section mylan myaclacl all src 0.0.0.0/0.0.0.0#acl all src 192.168.50.0/255.255.255.0#acl all2 src 10.0.0.0/255.0.0.0acl manager proto cache_objectacl localhost src 127.0.0.1/255.255.255.255acl to_localhost dst 127.0.0.0/8acl SSL_ports port 443 563 # https, snewsacl SSL_ports port 873 # rsyncacl Safe_ports port 80 # httpacl Safe_ports port 21 # ftpacl Safe_ports port 443 563 # https, snewsacl Safe_ports port 70 # gopheracl Safe_ports port 210 # waisacl Safe_ports port 1025-65535 # unregistered portsacl Safe_ports port 280 # http-mgmtacl Safe_ports port 488 # gss-httpacl Safe_ports port 591 # filemakeracl Safe_ports port 777 # multiling httpacl Safe_ports port 631 # cupsacl Safe_ports port 873 # rsyncacl Safe_ports port 901 # SWATacl purge method PURGEacl CONNECT method CONNECThttp_access allow manager allhttp_access deny managerhttp_access allow purge localhosthttp_access deny purgehttp_access deny !Safe_portshttp_access deny CONNECT !SSL_portshttp_access allow localhosthttp_access allow all#http_access allow all2http_reply_access allow all#http_reply_access allow all2icp_access allow all#==========================# Administrative Parameters#==========================# I used UBUNTU so user is proxy, in FEDORA you may use use squidcache_effective_user proxycache_effective_group proxycache_mgr SAJIDvisible_hostname aacable.wordpress.comunique_hostname aacable@hotmail.com# Memorycache_mem 8 MBminimum_object_size 0 bytesmaximum_object_size 700 MBmaximum_object_size_in_memory 32 KBtcp_outgoing_tos 0x30 allzph_mode toszph_local 0x30zph_parent 0zph_option 136acl store_rewrite_list urlpath_regex \/(get_video|videoplayback\?id|videoplayback.*id)acl store_rewrite_list urlpath_regex \.(jp(e?g|e|2)|gif|png|tiff?|bmp|ico|flv|wmv|3gp|mp(4|3)|exe|msi|zip|on2|mar)\?acl store_rewrite_list_domain url_regex ^http:\/\/([a-zA-Z-]+[0-9-]+)\.[A-Za-z]*\.[A-Za-z]*acl store_rewrite_list_domain url_regex (([a-z]{1,2}[0-9]{1,3})|([0-9]{1,3}[a-z]{1,2}))\.[a-z]*[0-9]?\.[a-z]{3}acl store_rewrite_list_path urlpath_regex \.(jp(e?g|e|2)|gif|png|tiff?|bmp|ico|flv|avc|zip|mp3|3gp|rar|on2|mar|exe)$acl
store_rewrite_list_domain_CDN url_regex
\.rapidshare\.com.*\/[0-9]*\/.*\/[^\/]*
^http:\/\/(www\.ziddu\.com.*\.[^\/]{3,4})\/(.*) \.doubleclick\.net.*acl store_rewrite_list_domain_CDN url_regex ^http:\/\/[.a-z0-9]*\.photobucket\.com.*\.[a-z]{3}$ quantserve\.comacl store_rewrite_list_domain_CDN url_regex ^http:\/\/[a-z]+[0-9]\.google\.co(m|\.id)acl
store_rewrite_list_domain_CDN url_regex
^http:\/\/\.www[0-9][0-9]\.indowebster\.com\/(.*)(rar|zip|flv|wm(a|v)|3gp|mp(4|3)|exe|msi|avi|(mp(e?g|a|e|1|2|3|4))|cab|exe)acl dontrewrite url_regex redbot\.org \.phpacl getmethod method GETstoreurl_access deny dontrewritestoreurl_access deny !getmethodstoreurl_access allow store_rewrite_list_domain_CDNstoreurl_access allow store_rewrite_liststoreurl_access allow store_rewrite_list_domainstoreurl_access allow store_rewrite_list_pathstoreurl_access deny all# First add storeurl.pl to enable below, see my other guides#storeurl_rewrite_program /etc/squid/storeurl.pl#storeurl_rewrite_children 7#storeurl_rewrite_concurrency 0##refresh_pattern -i \.htm 120 50% 10080 reload-into-imsrefresh_pattern -i \.html 120 50% 10080 reload-into-imsrefresh_pattern ^http://*.facebook.com/* 720 100% 4320refresh_pattern ^http://mail.yahoo.com/.* 720 100% 4320refresh_pattern ^http://*.yahoo.*/.* 720 100% 4320refresh_pattern ^http://*.yimg.*/.* 720 100% 4320refresh_pattern ^http://*.gmail.*/.* 720 100% 4320refresh_pattern ^http://*.google.*/.* 720 100% 4320refresh_pattern ^http://*.kaskus.*/.* 720 100% 4320refresh_pattern ^http://*.googlesyndication.*/.* 720 100% 4320refresh_pattern ^http://*.plasa.*/.* 720 100% 4320refresh_pattern ^http://*.telkom.*/.* 720 100% 4320### 1 year = 525600 mins, 1 month = 43800 minsrefresh_pattern imeem.*\.flv 0 0% 0 override-lastmod override-expirerefresh_pattern \.rapidshare.*\/[0-9]*\/.*\/[^\/]* 161280 90% 161280 ignore-reloadrefresh_pattern
(get_video\?|videoplayback\?|videodownload\?|\.flv?) 10800 80% 10800
ignore-no-cache ignore-private override-expire override-lastmod
reload-into-imsrefresh_pattern
(get_video\?|videoplayback\?id|videoplayback.*id|videodownload\?|\.flv?)
10800 80% 10800 ignore-no-cache ignore-private override-expire
override-lastmod reload-into-ims#refresh_pattern
-i
(get_video\?|videoplayback\?id|videoplayback.*id||videodownload\?|\.flv?)
10800 80% 10800 ignore-no-cache ignore-private override-expire
override-lastmod reload-into-imsrefresh_pattern
\.(ico|video-stats) 10800 80% 10800 override-expire ignore-reload
ignore-no-cache ignore-private ignore-auth override-lastmod
negative-ttl=10080refresh_pattern \.etology\? 10800 80% 10800 override-expire ignore-reload ignore-no-cacherefresh_pattern galleries\.video(\?|sz) 10800 80% 10800 override-expire ignore-reload ignore-no-cacherefresh_pattern brazzers\? 10800 80% 10800 override-expire ignore-reload ignore-no-cacherefresh_pattern \.adtology\? 10800 80% 10800 override-expire ignore-reload ignore-no-cacherefresh_pattern
^.*(utm\.gif|ads\?|rmxads\.com|ad\.z5x\.net|bh\.contextweb\.com|bstats\.adbrite\.com|a1\.interclick\.com|ad\.trafficmp\.com|ads\.cubics\.com|ad\.xtendmedia\.com|\.googlesyndication\.com|advertising\.com|yieldmanager|game-advertising\.com|pixel\.quantserve\.com|adperium\.com|doubleclick\.net|adserving\.cpxinteractive\.com|syndication\.com|media.fastclick.net).*
10800 20% 10800 ignore-no-cache ignore-private override-expire
ignore-reload ignore-auth negative-ttl=40320 max-stale=10refresh_pattern
^.*safebrowsing.*google 10800 80% 10800 override-expire ignore-reload
ignore-no-cache ignore-private ignore-auth negative-ttl=10080refresh_pattern ^http://((cbk|mt|khm|mlt)[0-9]?)\.google\.co(m|\.uk) 10800 80% 10800 override-expire ignore-reload ignore-private negative-ttl=10080refresh_pattern ytimg\.com.*\.jpg 10800 80% 10800 override-expire ignore-reloadrefresh_pattern images\.friendster\.com.*\.(png|gif) 10800 80% 10800 override-expire ignore-reloadrefresh_pattern garena\.com 10800 80% 10800 override-expire reload-into-imsrefresh_pattern photobucket.*\.(jp(e?g|e|2)|tiff?|bmp|gif|png) 10800 80% 10800 override-expire ignore-reloadrefresh_pattern vid\.akm\.dailymotion\.com.*\.on2\? 10800 80% 10800 ignore-no-cache override-expire override-lastmodrefresh_pattern
mediafire.com\/images.*\.(jp(e?g|e|2)|tiff?|bmp|gif|png) 10800 80%
10800 reload-into-ims override-expire ignore-privaterefresh_pattern
^http:\/\/images|pics|thumbs[0-9]\. 10800 80% 10800
reload-into-ims ignore-no-cache ignore-reload override-expirerefresh_pattern
^http:\/\/www.onemanga.com.*\/ 10800 80% 10800
reload-into-ims ignore-no-cache ignore-reload override-expire# ANTI VIRUSrefresh_pattern guru.avg.com/.*\.(bin) 10800 80% 10800 ignore-no-cache ignore-reload reload-into-imsrefresh_pattern
(avgate|avira).*(idx|gz)$ 10800 80% 10800
ignore-no-cache ignore-reload reload-into-imsrefresh_pattern
kaspersky.*\.avc$ 10800 80% 10800
ignore-no-cache ignore-reload reload-into-imsrefresh_pattern
kaspersky 10800 80% 10800
ignore-no-cache ignore-reload reload-into-imsrefresh_pattern
update.nai.com/.*\.(gem|zip|mcs) 10800 80% 10800
ignore-no-cache ignore-reload reload-into-imsrefresh_pattern
^http:\/\/liveupdate.symantecliveupdate.com.*\(zip) 10800 80% 10800
ignore-no-cache ignore-reload reload-into-imsrefresh_pattern windowsupdate.com/.*\.(cab|exe) 10800 80% 10800 ignore-no-cache ignore-reload reload-into-imsrefresh_pattern update.microsoft.com/.*\.(cab|exe) 10800 80% 10800 ignore-no-cache ignore-reload reload-into-imsrefresh_pattern
download.microsoft.com/.*\.(cab|exe) 10800 80% 10800
ignore-no-cache ignore-reload reload-into-ims#images facebookrefresh_pattern
((facebook.com)|(85.131.151.39)).*\.(jpg|png|gif) 10800 80% 10800
ignore-reload override-expire ignore-no-cacherefresh_pattern
-i \.fbcdn.net.*\.(jpg|gif|png|swf|mp3) 10800 80%
10800 ignore-reload override-expire ignore-no-cacherefresh_pattern
static\.ak\.fbcdn\.net*\.(jpg|gif|png) 10800 80% 10800
ignore-reload override-expire ignore-no-cacherefresh_pattern
^http:\/\/profile\.ak\.fbcdn.net*\.(jpg|gif|png) 10800 80% 10800
ignore-reload override-expire ignore-no-cache#banner IIXrefresh_pattern
^http:\/\/openx.*\.(jp(e?g|e|2)|gif|pn[pg]|swf|ico|css|tiff?) 10800
99999% 10800 reload-into-ims ignore-reload override-expire
ignore-no-cacherefresh_pattern
^http:\/\/ads(1|2|3).kompas.com.*\/ 10800 99999% 10800
reload-into-ims ignore-reload override-expire ignore-no-cacherefresh_pattern
^http:\/\/img.ads.kompas.com.*\/ 10800 99999% 10800
reload-into-ims ignore-reload override-expire ignore-no-cacherefresh_pattern
.kompasimages.com.*\.(jpg|gif|png|swf) 10800 99999% 10800
reload-into-ims ignore-reload override-expire ignore-no-cacherefresh_pattern
^http:\/\/openx.kompas.com.*\/ 10800 99999% 10800
reload-into-ims ignore-reload override-expire ignore-no-cacherefresh_pattern
kaskus.\us.*\.(jp(e?g|e|2)|gif|png|swf) 10800 99999% 10800
reload-into-ims ignore-reload override-expire ignore-no-cacherefresh_pattern
^http:\/\/img.kaskus.us.*\.(jpg|gif|png|swf) 10800 99999% 10800
reload-into-ims ignore-reload override-expire ignore-no-cache#IIX DOWNLOADrefresh_pattern
^http:\/\/\.www[0-9][0-9]\.indowebster\.com\/(.*)(mp3|rar|zip|flv|wmv|3gp|mp(4|3)|exe|msi|zip)
10800 99999% 10800 reload-into-ims ignore-reload override-expire
ignore-no-cache ignore-auth#All Filerefresh_pattern
-i \.(3gp|7z|ace|asx|avi|bin|cab|dat|deb|divx|dvr-ms) 10800 80%
10800 ignore-no-cache ignore-private override-expire override-lastmod
reload-into-imsrefresh_pattern
-i \.(rar|jar|gz|tgz|bz2|iso|m1v|m2(v|p)|mo(d|v)) 10800 80%
10800 ignore-no-cache ignore-private override-expire override-lastmod
reload-into-imsrefresh_pattern
-i \.(jp(e?g|e|2)|gif|pn[pg]|bm?|tiff?|ico|swf|css|js) 10800 80%
10800 ignore-no-cache ignore-private override-expire override-lastmod
reload-into-imsrefresh_pattern
-i
\.(mp(e?g|a|e|1|2|3|4)|mk(a|v)|ms(i|u|p)|og(x|v|a|g)|rar|rm|r(a|p)m|snd|vob|wav)
10800 80% 10800 ignore-no-cache ignore-private override-expire
override-lastmod reload-into-imsrefresh_pattern
-i \.(pp(s|t)|wax|wm(a|v)|wmx|wpl|zip|cb(r|z|t)) 10800 80% 10800
ignore-no-cache ignore-private override-expire override-lastmod
reload-into-imsrefresh_pattern (cgi-bin|\?) 0 0% 0refresh_pattern ^gopher: 1440 0% 1440refresh_pattern ^ftp: 10080 95% 10800 override-lastmod reload-into-imsrefresh_pattern . 180 95% 10800 override-lastmod reload-into-imsglobal_internal_static offmax_stale 10 yearsretry_on_error onbuffered_logs onread_ahead_gap 32 KBheader_access Accept-Encoding deny allclient_persistent_connections offserver_persistent_connections onhalf_closed_clients offstrip_query_terms offquick_abort_min 0 KBquick_abort_max 0 KBquick_abort_pct 100vary_ignore_expire onreload_into_ims onpipeline_prefetch onread_timeout 30 minutesclient_lifetime 6 hoursnegative_ttl 30 secondspositive_dns_ttl 6 hoursnegative_dns_ttl 60 secondspconn_timeout 15 secondsrequest_timeout 1 minutestore_avg_object_size 13 KBlog_icp_queries offipcache_size 16384ipcache_low 98ipcache_high 99log_fqdn offfqdncache_size 16384memory_pools offforwarded_for onclient_db onmax_filedescriptors 8192 |
http://aacable.wordpress.com/2011/06/01/linux-simple-internet-sharing-script/
For basic SQUID configuration , Please read the following post.
http://aacable.wordpress.com/2011/08/08/linux-transparent-squid-proxy-server-guide/
For fine tuned squid.conf, Please read the following post.
http://aacable.wordpress.com/2011/06/01/working-squid-conf-example-fil/
For ZPH configuration in squid, Please read the following post. (To deliver cache content to user in full lan speed, exempt cache content from queue)
http://aacable.wordpress.com/2011/07/21/mikrotik-with-squidzph-unlimited-speed-for-cache-content-traffic/
_______________________________________
3) RADIUS MANGER CONFIGURATION [using FEDORA 10] The Real Giant :p

MANAGER Version 3.9
INSTALLATION MANUAL © DMA Softlab LLC
This RM installation guide is a shorter version, copied from DMASOFTLAB RM original manual. I edited it and cut off all un-necessary paragraphs which are not required for basic installation and added some info of my personnel experience.
For RM Screenshot gallery, please visit following link.
http://www.dmasoftlab.com/cont/screenshots
This document describes the installation procedure of Radius Manager billing system on a Linux host using FEDORA 10. For beginners I recommend the usage of Fedora Core 10. Fedora Core is the easiest and the most comfortable Linux system for RM isntallation (Although I have tested in Ubuntu also, but still FED wins in few aspects) It comes with all required packages to install and run Radius Manager. The packages are available on the installation media and they are also down-loadable from the official online repositories using the Yum tool.
In this document You will also find guidelines on how to set up your NAS (mikrotik) to integrate with Radius Manager system.
To successfully install Radius Manager on your host, You have to complete the following steps:
1. Install ionCube runtime libraries
2. Build and configure FreeRadius server
3. Configure MySQL database and credentials
4. Install Radius Manager WEB components
5. Install Radius Manager binaries
6. Complete the post installation steps and fine tuning
INSTALLATION Prerequisites:
To successfully install and run Radius Manager, You need the following components installed on the Linux host, If they are not isntalled already, dont worrry
Software Requirements:
• FreeRadius 2.1.8 DMA mod 2 (downloadable from http://www.dmasoftlab.com)
• PHP 5 or better
• MySQL 5 or better
• MySQL development libraries
• php-mysql
• php-mcrypt
• curl, php-curl
• glibc 2.4 or better
• GNU C/C++ compiler
• IonCube runtime libraries. They are downloadable freely from http://www.ioncube.com and http://www.dmasoftlab.com
• Javascript enabled browser on running on client machines
Preparing the Linux system Fedora 10
Install the necessary components on your Linux host before You begin the installation of Radius Manager.
1. Disable SeLinux in /etc/sysconfig/selinux and reboot your host:
1
| SELINUX=disabled |
1
| yum install make php php-mysql php-mcrypt mysql-devel mysql-server gcc libtool-ltdl |
Installation procedure of ionCube runtime system
Radius Manager requires ionCube runtime libraries. You can download them from: http://www.dmasoftlab.com/downloads
Before installing ionCube, You have to know the following:
1. The architecture of your Linux system (32 or 64 bit) (usually 32bit pc is used in most cases, I will use 32bit only as example)
2. Which PHP version are You using (use php -v to view version info, hopefully you will get v5.2.9)
3. Where is your php.ini file located (On fedora its usually /etc/php.ini)
Example ionCube installation
1. First create a temp folder in root
1
2
| mkdir /temp cd /temp |
UNTAR the ionCube runtime libraries to /usr/ local/ioncube by using following command
1
| tar zxvf ioncube_loaders_lin_x86.tar.gz |
1
| cp /temp/ioncube/* /usr/local/ioncube/ |
1
| zend_extension=/usr/local/ioncube/ioncube_loader_lin_5.2.so |
1
2
3
4
5
6
7
8
| [root@localhost]# php -vYou have to see the ionCube PHP Loader version displayed correctly.PHP 5.2.9 (cli) (built: Apr 17 2009 03:29:12) Copyright (c) 1997-2009 The PHP Group Zend Engine v2.2.0, Copyright (c) 1998-2009 Zend Technologies with the ionCube PHP Loader v3.3.14, Copyright (c) 2002-2010, by ionCube Ltd. |
sevice httpd restart
5. Run ifconfig command from shell to determine the MAC address of the network interface card (NIC):
1
2
3
| [root@localhost]# ifconfigeth0 Link encap:Ethernet HWaddr 00:00:E8:EC:8A:E8 |
Radius Manager will run only on the specified host and the license is binding to the MAC address of the network interface card. You can migrate Radius Manager to another host if You also move the same network interface card with it.
It is strongly recommended to request a license for a removable networking interface to allow migration to new host without loosing the license.
7. When a license file is issued (You will get a notification about it in email), download and copy the lic.txt and mod.txt to radiusmanager web directory (read the “Installation procedure of Radius Manager” chapter of this manual) to enable licensing of your Radius Manager installation.
Troubleshooting the ionCube loader system
If encoded files fail to run, you can test ionCube runtime by using the helper PHP script ioncubeloader-helper.php, which is included in the loader download archive.
1. Copy the ioncube-encoded-file.php PHP script to your http root (on Redhat-based system it is /var/www/html).
2. Try to access the ioncube-encoded-file.php script using your favorite web browser:
3. If You can see the message “This file has been successfully decoded. ionCube Loaders are correctly installed”, it means You have successfully installed ionCube runtime on your host and it is ready to use. If You can’t decode the file via a HTTP call, check the php.ini and be sure SeLinux is disabled.
Installation procedure of FreeRadius
Follow the installation steps to successfully build, install and configure FreeRadius RADIUS server on your host. Use only FreeRadius 2.1.8 DMA mod 2 source archive (downloadable from our site). It is prepared and tested by our team and it is 100% compatible with Radius Manager.
Other versions and builds will not function properly with Radius Manager. If your host already has a different FreeRadius version installed, remove it completely including it’s configuration files (/etc/raddb or /usr/local/etc/raddb).
Execute the following actions as super user (root user):
1. Download FreeRadius archive in /temp folder from the following URL: http://www.dmasoftlab.com/downloads by issuing following command
2. Build FreeRadius server from sources. Do it in the following way. Ungzip and untar the FreeRadius archive:
1
2
| gzip -d freeradius-server-2.1.8-dmamod-2.tar.gztar xvf freeradius-server-2.1.8-dmamod-2.tar |
1
2
3
4
| cd freeradius-server-2.1.8./configure make make install |
3. Now You can test FreeRadius in debug mode. Start it with parameter -X
1
2
3
4
5
6
| radiusd -XListening on authentication address * port 1812 Listening on accounting address * port 1813 Listening on command file /usr/local/var/run/radiusd/radiusd.sock Listening on proxy address * port 1814Ready to process requests. |
If radiusd cannot find the required libraries, issue ldconfig from shell to refresh the ld linker’s cache.
1
| ldconfig |
1
2
| chown apache /usr/local/etc/raddb chown apache /usr/local/etc/raddb/clients.conf |
5. Review and modify (if needed) the MySQL credentials in /usr/local/etc/raddb/sql.conf: by issuing following command
1
2
3
4
5
6
| nano /usr/local/etc/raddb/sql.conf# Connection info: server = “localhost” #port = 3306 login = “radius” password = “radius123” |
If You are familiar with MySQL command line tool, You can create databases, users and permissions with it easily and much faster. First start MYSQL daemon via
1
| service mysqld start |
1
| mysql -u root -ppassword |
1
| mysqladmin -u root password NEWPASSWORD |
1
| mysqladmin -u root -p’oldpassword’ password newpass |
1
2
3
4
5
6
| CREATE DATABASE radius; CREATE DATABASE conntrack; CREATE USER 'radius'@'localhost’ IDENTIFIED BY 'radius123'; CREATE USER 'conntrack'@'localhost' IDENTIFIED BY 'conn123'; GRANT ALL ON radius.* TO radius@localhost; GRANT ALL ON conntrack.* TO conntrack@localhost; exit |
Completing this step the databases are ready to use.
Installation procedure of Radius Manager
There are two methods of installation available:
1. Interactive, using the included installer script. (We will focus on this as its easier for newbie)
2. Manual installation, using Unix commands. (We will not discuss it as its already briefly described in RM Manual)
Interactive installation
The easiest way to install Radius Manager is to use the included install.sh script. It is located in Radius Manager tar archive and can be used on Redhat, Debian and (with slight modification of the environment) on other systems. Before You begin, be sure You have prepared the MySQL database tables and credentials. Radius Manager requires two databases:
1. RADIUS – for storing all system data, including users and accounting information.
2. CONNTRACK – for storing connection tracking system (CTS) data.
Create both databases even on a non-CTS enabled system.
Now download RM (radiusmanager-3.9.0.tgz) from dma customer portal in /temp folder. Now decompress the Radius Manager tarball using following command.
1
2
| tar xf radiusmanager-3.9.0.tgz cd radiusmanager-3.9.0-rel-allpatches-1-5/ |
1
2
3
4
5
6
7
8
9
10
11
12
| chmod 755 install.sh./install.shRadius Manager installer Copyright 2004-2011, DMA Softlab LLC All right reserved. (Use CTRL+C to abort any time)Select the type of your operating system: 1. Redhat (Fedora, CentOS etc.) 2. Debian (Ubuntu etc.) Choose an option: [1] |
Now select the installation method:
1
2
3
4
5
| Select installation type:1. New installation2. Upgrade old system Choose an option: [1] |
1
2
3
| Choose an option: [1] Selected installation method: NEW INSTALLATION WWW root path: [/var/www/html] |
Now define the MySQL database credentials:
1
2
3
4
5
6
| RADIUS database host: [localhost] RADIUS database username: [radius] RADIUS database password: [radius123] CTS database host: [localhost] CTS database username: [conntrack] CTS database password: [conn123] |
The host is “localhost” by default. If You have different setup, specify proper values. If You are planning to use the system with hundreds of online users, it is recommended to use separate database host for CONNTRACK database.
In the next step You have to define the FreeRadius user. It must be the correct user to set the permission properly on /etc/radiusmanager.cfg. If there are permission problems on /etc/radiusmanager.cfg, Radius Manager binaries will not function at all.
Freeradius UNIX user: [root]
On Fedora it is root, so simply press enter.
Now define the HTTP user (the user name under Apache is running). It is required to set the permission on files in radiusmanager/config directory. On Fedora it is the apache user.
Httpd UNIX user: [apache]
You can now decide to create rmpoller service or not? It is a standard Fedora / Debian compatible service script which invokes rmpoller helper. You can also start rmpoller using alternative ways.
Create rmpoller service: [y]
In most cases simply press enter. When a service has been created, You can use the command (on Fedora)
service rmpoller [start | stop]
to control rmpoller service activity. Also make this service auto starting at boot time together with FreeRadius. Use command chkconfig -add rmpoller on or use Webmin to activate the service at boot time.
In the next step select yes if You want to create the rmconntrack service. It is a standard Linux service, like rmpoller. It is required for Radius Manager CTS only.
Create rmconntrack service: [y]
When a service has been created, You can use the command
service rmconntrack [start | stop]
to control rmconntrack service activity. Also make this service auto starting at boot time.
It is strongly recommended to create a full database backup before You continue. Answer ‘yes’ to the following question:
Back up RADIUS database: [y]
Now the system warns You it will overwrite the existing databases if You continue. Press ‘y’ to continue or ‘n’ to abort the installation process.
1
2
3
4
5
6
7
8
9
10
11
12
13
14
15
16
| WARNING! If You continue You will overwrite the existing RADIUS database! Are You sure to start the installation? [n] You can press Ctrl+C any time to abort the installation process.Starting installation process... Backing
up radiusmanager.cfg Backing up system_cfg.php Backing up
netcash_cfg.php Backing up paypal_cfg.php Backing up
authorizenet_cfg.php Backing up dps_cfg.php Backing up 2co_cfg.php Copying web content to /var/www/html/radiusmanager Copying binaries to /usr/local/bin Copying rootexec to /usr/local/sbin Copying radiusmanager.cfg to /etc Backing up RADIUS database... Creating mysql tables Creating rmpoller service Creating rmconntrack service Copying logrotate script Setting permission on raddb files Copying radiusd init script to /etc/init.dInstallation finished! |
Add the following line to /etc/crontab to execute rmscheduler.php every day after midnight by issuing following command:
1
| crontab -e |
Now press i and add the the following entry.
1
| 02 0 * * * root /usr/bin/php /var/www/html/radiusmanager/rmscheduler.php 12345 |
Now press ESC button, now press SHIFT+: , now press wq
it will save the crontab and exit.
12345 is the default password, as it is defined in system_cfg.php. Always specify the full path of the PHP interpreter. If You are not sure, check it’s location before You add the crontab record. The password has to match the predefined one in system_cfg.php.
Now download the the license files (lic.txt and mod.txt) and copy them in in radiusmanager web folder
1
2
| cp lic.txt /var/www/html/radiusmanager cp mod.txt /var/www/html/radiusmanager |
Reboot your system to check if helper services are starting properly (radiusd, rmpoller and optionally rmconntrack). By default few services donot run at Fed startup, See the last paragraph of this guide on Starting daemons at boot time so that required services automatically starts at boot. You can use the following commands to make sure the services starts at boot time.
1
2
3
4
5
6
| chkconfig --add radiusd chkconfig --add rmpoller chkconfig --add rmconntrack chkconfig --add mysqld chkconfig --add httpd chkconfig --add dnsmasq |
1
2
3
4
5
| radiusd -XListening on authentication address * port 1812 Listening on accounting address * port 1813 Listening on command file /usr/local/var/run/radiusd/radiusd.sock Listening on proxy address * port 1814 Ready to process requests. |
1
2
3
4
5
6
7
8
| radtest user 1111 localhost 1812 testing123Sending Access-Request of id 57 to 127.0.0.1 port 1812 User-Name = “user” User-Password = “1111” NAS-IP-Address = 127.0.0.1 NAS-Port = 1812 rad_recv: Access-Accept packet from host 127.0.0.1 port 1812, id=57, length=50 WISPr-Bandwidth-Max-Up = 262144 WISPr-Bandwidth-Max-Down = 262144 Acct-Interim-Interval = 60 |
• Is MySQL server running?
• Are MySQL credentials correct? • Are MySQL table permissions correct? • Can FreeRadius connect to MySQL database?
• Have You created the RADIUS and CONNTRACK databases and tables?
• Is the NAS defined in ACP? In this case it is 127.0.0.1 ?( NAS-IP-Address = 127.0.0.1).
• If the hostname is different than localhost, You have to substitute the localhost with the IP address of the Linux server. You have to update the NAS list in RM ACP in this case.
Enter the ip address of Mikrotik. In Secret , type the secret that you will set in Mikrotik RADIUS (See below section / screenshot)

Also test the functionality of the User Control Panel (UCP):
The initial username and password are:
1
2
| Username: user Password: 1111 |
System optimization Tips
The performance of the entire Radius Manager system mainly depends on the speed of the hard disks and the MySQL subsystem. If You encounter performance problems, check the following:1. Check radacct table size. If it is large (> 300-500 MB), delete the old years from it using the deloldyears.sql script (included in the RM tar archive in doc directory).
2. Add more RAM to the system. Adding 2-4 GB of RAM doesn’t mean any problem nowadays.
3. Use RAID 0 or RAID 5 array MySQL db storage devices.
4. Optimize the MySQL server via my.cnf file.
key_buffer=1024M
myisam_sort_buffer_size=512M sort_buffer_size=32M
Set key_buffer = RAM size / 2, myisam_sort_buffer_size = RAM size / 4, sort_buffer_size = RAM size / 64.
Adding more RAM will drastically speed up the MySQL system. Indexes must be fit in the RAM for optimal performance.
Notes
By default, many web servers can list the contents of the directory where Radius Manager files are stored. To prevent this there are several methods available:
1. Use .htaccess file. Enable the Options -Indexes directive In .htaccess file (example file is included in radiusmanager directory in the installation archive). Be sure to enable the htaccess support in order to use this feature (set AllowOverride All directive in httpd.conf).
2. Disable the directory listing in httpd configuration files.
HOWTO REPLACE/MODIFY DMASOFTLAB RM LOGO and TEXT !!!
You can Replace/Edit the default DMASOFTLAB logo files. by default, Images are available where you have installed the radiusmanager. Look into the images folder of radiusmanager.For example I installed RM in /var/www/html/radiusmanager. There will be a folder name ‘images’ Look for these files.
dmalogo_small.gif
radmanlogo_small.gif
main1_01.gif
main1_02.gif
main1_03.gif
emailheader.gif
Edit Various Text/headings show at UCP/ACP
You can also edit the texts/descriptions in language description files in radiusmanager/lang/english folder.look for texts.txt and strings.txt
To add logo in prepaid cards
You can modify its base image at radiusmanager/lang/english/card folder.look for classic_bg.png and refill_bg.png
Some Example:

MIKROTIK NAS CONFIGURATION
Setting up RADIUS authentication and accountingTo send authentication and accounting requests to Radius server, You have to configure your Mikrotik NAS. Use Winbox to view and edit the configuration. Follow these steps:
1. Connect to your Mikrotik router using Winbox.
2. Select Radius from the main menu.
3. Click on the + to create a new RADIUS server description:
(see the attached screenshot)

Description of fields:
• Service:
• PPP: for PPP RADIUS authentication
• Address is your RADIUS server host. eg 192.168.2.1
• Secret is the NAS secret from /usr/local/etc/raddb/clients.conf e.g 12345
• Authentication and Accounting ports are the standard RADIUS ports.
• Timeout defines how much milliseconds can elapse while the answer arrives from the RADIUS server. If You are using slower connection to RADIUS server or the accounting tables are large, set this timeout higher (3000-5000 ms).
Now Set the AAA options of PPP service (PPPoE): Goto PPP / Secrets / click on PPP Authentication & Accounting Button, and see the following.

Turn on RADIUS authentication (Use Radius) and RADIUS accounting (Accounting). Interim update is the time interval when RADIUS client (Mikrotik NAS) sends the accounting information to the RADIUS server. If You have more than 200 online users, use higher values (5-8 minutes) to avoid MySQL overload.
Now Enable incoming RADIUS requests (POD packets). It is required to use the REMOTE disconnection method in Radius Manager: Don’t forget to open the UDP port 1700 in firewall on Mikrotik and Linux server.

To Test the database connectivity: use the following command from RADIUS CLI.
1
2
3
| rmauth 192.168.2.9 user 1Mikrotik-Xmit-Limit=1028,Mikrotik-Rate-Limit=”262144/262144” |
To successfully test rmauth, You have to create NAS entries in ACP. In this example, the NAS IP
You have to restart FreeRadius every time when You modify the NAS devices. Unfortunately FreeRadius doesn’t read the configuration files dynamically.
ADDITIONAL SETUP
Starting daemons at boot time
Radius Manager system supports automatic startup of daemons: radiusd, rmpoller and rmconntrack. The automatic installer copies all the required scripts to /etc/init.d directory and sets the required permissions on them.
The following methods are available to set up automatic service startup:
• Use Webmin to start services at boot time or
• Use command chkconfig –add [service_name] (Fedora only)
A chkconfig example follows:
1
2
3
4
5
6
| chkconfig --add radiusd chkconfig --add rmpoller chkconfig --add rmconntrack chkconfig --add mysqld chkconfig --add httpd chkconfig --add dnsmasq |
ADDED SECURITY: (My Suggestion, zaib)
I placed this RADIUS Server on user subnet, which is not suitable, palce it on behind Mikrotik DMZ,then create a user in Mikrotik For example ‘user’ with restricted ip pool, and using FIREWALL rules,
Restrict this id/ip to access only RADIUS Server , block all other access for this id / pass.
This way user have to first dialin to open RM User Self Care Portal.
HOWTO ADD Service Plans in RM ACP & Generate Prepaid/Refill Cards:
256Kbps Monthly Service Plan
Following is an example on howto add New Service and assosicate it with new user.Package = 256Kb
Expiry = 30 Days
Login to RM ACP , Goto Services and click on New Service.
In Service Name* tpye ’256Kbps Monthly’
Click on ‘Available in UCP‘
Click on ‘Limit Expiration’
on ‘Set data rates’ (DL/UL) type 256 / 256
Now goto Bottom and in ‘Expiration Date Unit’ Select 1 , Initial 0, and
Finally, Click on Store Service Bottom in the End.
Done Your new service is created with 256Kbps Speed Limitation with 1 Month Up-Time Limitaion.
Following are screenshot for the above created Service.


- Add Service – Image 2 aacable@hotmail.com


rm-add-pre-paid-cards / aacable@hotmail.com
HOWTO ADD QUOTA BASE SERVICE IN RM:
Now we will Add Quota Base Service Plan. For example User is allowed to use 1GB @ 1mbps per Day, After using his 1 GB Quota, his service plan should auto switch to 256Kbps speed plan for the rest of teh day. . . We have to use DAILY SERVICE option in RM for this purpose. First create Daily service with 256Kbps limitation, and then create the 1Mbps / 1Gb Daily Quota limit service and use the next dail service option in 1mb service plan to point it to 256k.First we will create 256Kbps service plan. This will be very simple basic plan.
Open RM ACP, Goto Services, and create new service, and name it
256Mbps – Daily Service , rest of options can be set by seeing the image below.

256k-daily-image-1
- 256k-daily-image-2
Open RM ACP, Goto Services, and create new service, and name it
256Mbps – Monthly , rest of options can be set by seeing the image below.

1mb-1gb-quota-image-1

1mb-1gb-quota-image-2

1mb-1gb-quota-image-3
HOWTO SEND EMAIL NOTIFICATIONS / WARNING TO USERS BEFORE THERE ACCOUNT EXPIRE
Goto Home / system settings , here you can set it.
4) LINUX TRANSPARENT FIREWALL BRIDGE CONFIGURATION [using FEDORA 10]


Following is a comprehensive guide on how you can setup Linux base Transparent bridge with advance firewall capabilities like DHCP Server MACto IP binding restriction, Easily add remove clients via single file using text editor or WEBMIN, Also you can Port Filtering to block unwanted traffic from passing through.
A bridge is a way to connect two Ethernet segments together in a protocol independent way. Packets are forwarded based on Ethernet address, rather than IP address (like a router). Since forwarding is done at Layer 2, all protocols can go transparently through a bridge.You can think of a bridge like a advance manageable network switch/firewall/router. We will be using this Linux Transparent bridge according to the network diagram shown at the start of this article.
The job of the bridge is to examine the destination of the data packets one at a time and decide
whether or not to pass the packets to the other side of the Ethernet segment. The result is a faster, quieter
network with less collisions.
You don’t need to change your existing network layout. You just plug in the bridge and you start working. If for some reasons, your Linux bridge box should go down, reconnect the cables from your bridge to your switch, and nobody will even notice that something was not working!
The placement of the bridge would be something like.
Sserver’s >> switch >>eth0>> LINUX BRIDGE with 2 interfaces >>eth1>> User Switch >>User
Pc’s
Now there are few scripts involved in engaging the bridge, If any one requires them, email me and I will send him my script copies, File Name: firewall.rar
SIMPLE STEP BY STEP instructions on howto copy and execute the scripts:
HAWRDWARE REQUIREMENTS:
Any adequate P4 / Xeon Dual Core with at least 1 GB RAM , 2 Lan Cards (preferably Gigabit)
SOFTWARE REQUIREMENTS:
Any Linux flavor, preferably FEDORA CORE 10 or likewise (Full installation with all packages selected at them time of installation, specially bridge utilities)
After successfull installation of FEDORA, copy firewall.rar , unrar them, and copy all scripts in a folder
/firewall/aacable

Now goto /firewall/aacable folder, make all scripts executable by issuing command chmod +x *.*
If required, convert them using dos2unix command, as sometimes copying it from windows generates some problems.
Now copy rc.local to /etc/ (overwrite older one) & restart the system.
Now after booting , rc.local will excute following files . . .
1)
/firewall/aacable/bridge.sh
(It will remove ip address from eth0 n eth1 and create bridge interface br0 with following ip: 10.0.8.1 for remote access and management of local bridge system, also dhcpd will be bind to this interface)
2)
/firewall/aacable/conf
(This is some custom configuration to prevent timeouts / delays, Latency and some other stuff)
3)
/firewall/aacable/start
(This is the main firewall script , It will execute All DHCP n Firewall related Scripts one by one. It will add all mac/ ip foundin macip.allowed file in dhcp configuration file and then bind them using iptables so that user mac ip must be matched with the file accordingly otherwise user access will not be granted. Any user whose entry will not be found in macip.allowed file, will get off subnet ip like 192.168.100.x
You can view the ‘start‘ file and see the related actions defined in there.
Your BRIDGE is ready & Following restrictions will be in place.
1)
If a user MAC n IP is found in /firewall/aacable/macip.allowed file, User will be granted valid ip as you entered in the macip.allowed file, for example
00:19:d1:fd:83:b1 10.10.2.13 # ZAIB-PC
The user with above mac address will always get the 10.10.2.13 ip, if he manually tries to change the ip or mac, he will not be able to pass the bridge. MAC n IP combination matching is required in order to pass the bridge.
If a user MAC n IP is not found in /firewall/aacable/macip.allowed file, User will be granted INVALID ip series from following off subnet 192.168.100.10-192.168.100.200 and thus will be completely isolated from the local valid network.
You can change all ip series in DHCP related files.
To add user , you can manually edit /firewall/aacable/macip.allowed file and add entry in following format
00:16:76:7E:05:7B 10.0.0.1 # SERVER1-ISA
00:06:5b:62:71:0a 10.10.2.12 # JOHN-LAPTOP
and the run start file which will add entry in macip.allowed file and add dhcp entry and run the security script.
OR the easiest way is to setup WEBMIN and link the file with webmin, so you can add/remove files easily via webmin GUI.I have done some advance customization of webmin, I added support user in webmin for support personnel , and grant him only right of editing this file, after the support personnel edit this file and click on save, it automatically execute the start script which add / remove all entries again in firewall. See the below images for example.


This firewall script also blocks few ports which are commonly used in virus flooding. thus saving junk traffic from passing by from one end to other end.
You can do many interesting things using this bridge :~)
BRIDGE SETUP DONE.
x=x=x=x=x=xx=x=x=x=x=x=x=x=x=x=x=x=x=x=x=x=x=x
Note: Later on, I moved FTP servers from Mikrotik DMZ to User Subnet, I also changed FTP operating system from Microsoft Windows 2003 R2 Server to Ubuntu Linux and set all sharing via Apache and linked apache authentication with Radius Manager , This step was done because there was unnecessary junk load of FTP data going through Mikrotik router , so I placed them on user subnet and put radius authenticaiton on it, so only valid account holder can access it. I have also posted an article on my blog website on how I achieved it.
So guys, this is a very shorten version
of how I completed this project. It was a very good project for me. I
learned many new techniques on howto handle various issues. It took me
many days n nights in googling, and I must say GOOGLE was my best friend
and I consider google my teacher
If you need any assistance , Do let me know
Later Updates Year 2012:**
http://aacable.wordpress.com/2012/11/30/dmasoftlab-radius-manager-install-backup-restore-short-reference-guide/
http://aacable.wordpress.com/2012/11/26/dmasoftlab-radius-manager-sms-notification-configuration/
http://aacable.wordpress.com/2012/11/26/howto-configure-your-local-http-gateway-using-kannel-on-ubuntu/
http://aacable.wordpress.com/2012/11/22/howto-enable-mikrotik-to-sendreceive-sms-using-gsm-modem/
http://aacable.wordpress.com/2012/11/20/dmasoftlab-radius-manager-different-bandwidth-for-day-night/
http://aacable.wordpress.com/2012/11/20/dmasoftlab-rm-email-notifications-for-various-events/
http://aacable.wordpress.com/2012/11/20/mikrotik-radius-manager-quota-base-service/
Regard’s
Waseem Anjum Meo
Email:
+92.333.1767265


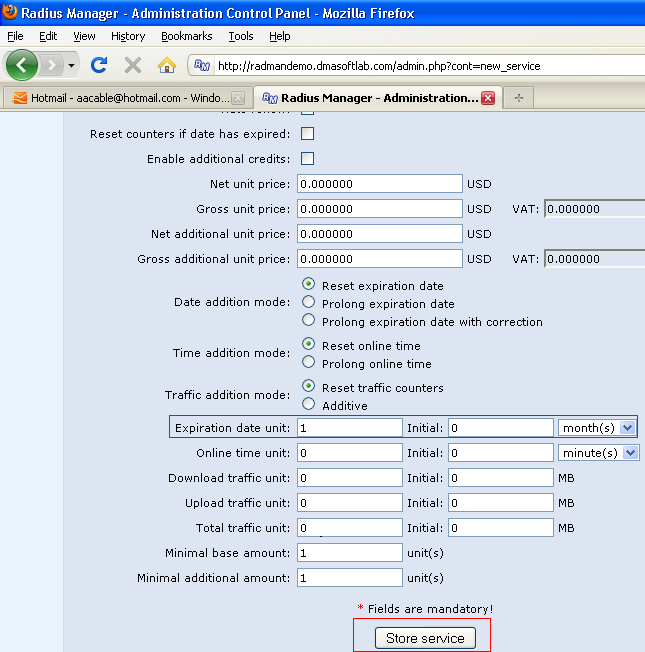
Radius Manager 4.x.x License Generator Crack.
ReplyDeleteDownload: https://mega.co.nz/#!z9FUBbBA!srfKtUQMzdYnIXkeU5iGLVxeJlbi0gqdiEe7iGsZ9LU
Thats a Virus. File detected as virus by AVG - stupid me, disabled the protection and ran the file, which vanished like nothing was there.
DeleteHello Everyone
DeleteAnyone wants genuine & fresh leads, I'm here to provide you.
If you have any doubt, you can ask for samples, will give you leads for testing.
Data includes in it:
First Name
Last Name
SSN
DOB
Phone Numbers
Address
City
State
Zip
Residential Status
Account Number
Routing Nummber
DL number
Emails
Dealing in almost all types of leads.
SSN Leads
Dead Fullz
Premium Leads
Mortgage Leads
Bank Account Leads
Dob leads
Senior Citizens leads
Employee Leads
Business Leads
Home Owners Leads
DL Leads
Emails Leads
Phone Numbers Leads
Available data of USA & Canada.
Each lead will be cost $1, if you want in bulk I can negotiate.
I request, it's not campaign data, so please don't ask me for that cheap data.
For Serious Buyers, below are the details to contact:
Whatsapp > +923172721122
email > leads.sellers1212@gmail.com
telegram > @leadsupplier
ICQ > 752822040
Hi, I downloaded a billing software for isp by visp.net for free, you can also try. I'm enjoying this software.
ReplyDeleteHello Everyone
ReplyDeleteAnyone wants genuine & fresh leads, I'm here to provide you.
If you have any doubt, you can ask for samples, will give you leads for testing.
Data includes in it:
First Name
Last Name
SSN
DOB
Phone Numbers
Address
City
State
Zip
Residential Status
Account Number
Routing Nummber
DL number
Emails
Dealing in almost all types of leads.
SSN Leads
Dead Fullz
Premium Leads
Mortgage Leads
Bank Account Leads
Dob leads
Senior Citizens leads
Employee Leads
Business Leads
Home Owners Leads
DL Leads
Emails Leads
Phone Numbers Leads
Available data of USA & Canada.
Each lead will be cost $1, if you want in bulk I can negotiate.
I request, it's not campaign data, so please don't ask me for that cheap data.
For Serious Buyers, below are the details to contact:
Whatsapp > +923172721122
email > leads.sellers1212@gmail.com
telegram > @leadsupplier
ICQ > 752822040
fffff
ReplyDeleteDo you need an urgent loan of any kind? Loans to liquidate debts or need to loan to improve your business have you been rejected by any other banks and financial institutions? Do you need a loan or a mortgage? This is the place to look, we are here to solve all your financial problems. We borrow money for the public. Need financial help with a bad credit in need of money. To pay for a commercial investment at a reasonable rate of 3%, let me use this method to inform you that we are providing reliable and helpful assistance and we will be ready to lend you. Contact us today by email: daveloganloanfirm@gmail.com Call/Text: +1(501)800-0690 And whatsapp: +1 (315) 640-3560
ReplyDeleteNEED A LOAN?
Ask Me.
very helpful! Here you will get all kind of solution like
ReplyDeletehow to reset d'link router admin password
how to reset d'link router admin password
D-link Support Number Australia
DO YOU NEED A PERSONAL/BUSINESS/INVESTMENT LOAN? CONTACT US TODAY VIA WhatsApp +19292227023 Email drbenjaminfinance@gmail.com
ReplyDeleteHELLO
Loan Offer Alert For Everyone! Are you financially down and you need an urgent credit/financial assistance? Or are you in need of a loan to start-up/increase your business or buy your dream house. Are you in search of a legit loan? Tired of Seeking Loans and Mortgages? Have you been turned down by your banks? Have you also been scammed once? Have you lost money to scammers or to Binary Options and Cryptocurrency Trading, We will help you recover your lost money and stolen bitcoin by our security FinanceRecovery Team 100% secured, If you are in financial pains consider your financial trauma over. We Offer LOANS from $3,000.00 Min. to $30,000,000.00 Max. at 2% interest rate NO MATTER YOUR CREDIT SCORE. GET YOUR INSTANT LOAN APPROVAL 100% GUARANTEED TODAY VIA WhatsApp:+19292227023 Email: drbenjaminfinance@gmail.com
Get Quality Leads, Fullz, Pros, Database
ReplyDelete(USA STUFF)
--------------------------------
| SSN DOB DL Address Employee & Bank Info Fullz
| Bank Account & Routing Numbers
| USA DL Front back with Selfie
| USA Passport Photos
| Cars Database with MVR
| USA LLC Docs with DL Photos
| DL Fullz with Issue & Expiry Dates
| Get Specific States, Cities, Gender, Age, Zip codes
| USA CC's with CVV Fullz
| High Credit Score Pros
| Young & Old Age Fullz
| Business EIN Company Fullz
| USA Email Combos
(UK STUFF)
--------------------------------
| NIN DOB Address Fullz Sort Code Account Number
| NIN, DOB, DL Address Fullz
| UK DL Front Back with Selfie & Passports
| NIN Dob address info in bulk
| UK CC's with CVV Fullz
| All UK Counties Fullz
| UK Email Combos
(CANADA STUFF)
--------------------------------
| SIN DOB Address Fullz
| SIN DOB Address MMN EMAIL & Phone Info Fullz
| DL Front Back with Selfie
| CA CC's with CVV Fullz
| Canada All states DL & Passport Photos
| Canada Email Combos
USA Headers:
FIRST NAME|MIDDLE NAME|LAST NAME|SSN|DOB|DL NUMBER |DL STATE|PHONE HM|PHONE WORK|PHONE CELL|EMAIL|ADDRESS|
|CITY|STATE|ZIP|RESIDENT STATUS|EMPLOYER|OCCUPATION|JOB STATUS|MONTHLY INCOME|ROUTING NUMBER|ACCOUNT NUMBER
UK Headers:
FIRST NAME|SURNAME|DATE OF BIRTH|NI NUMBER|ADDRESS|CITY|STATE|POST CODE|EMAIL ADDRESS|NUMBER|SORT CODE|ACCOUNT NUMBER|ACCOUNT NAME
CANADA Headers:
FIRST NAME |LAST NAME |ADDRESS |CITY |STATE |COUNTRY |DOB |SIN |PHONE |EMAIL |MMN |ZIPCODE
(ADVANCE TOOLS & TUTORIALS)
---------------------------------------------
Spamming Complete Package
Hacking Complete Package
CC & Dumps Tutorials
CC hacking tutorials
Scam Pages & Scam Page Scripting
C-panels & Web-mailers
SMTP RDP Shells
Bulk SMS Sender PC/Mob
Kali Linux Package with Tutorial
Cash out & Transfer Methods
Available 24/7 at:
WhatsApp – (+1) 605... 846... 1870..
Telegram – @ Fullzpros
TG Chanel – @ bigdatatrader
Mail – Silasclark99 at gmail dot com
VK ID – Fullzpros