Posts

Showing posts from 2016

Mikrotik Hotspot User Manager Tutorial Configuration
Image
Mikrotik Hotspot User Manager Tutorial Configuration  - User Manager on Mikrotik Router is a management system that can be used for manage and control system on hotspot user, PPP (PPtP/PPPoE) users, DHCP users, Wireless users, and RouterOS users. How To Install User Manager On Mikrotik Router 1. Donwload NPK package user manager at mikrotik website. Recomendation : Upgrade first, firmware or routeros your mikrotik router. See "  How to Upgrade firmware or routeros mikrotik router  " 2. Login to mikrotik router using winbox 3. Go to  Files Menu , drag and drop usermanager.npk to Files Menu 4. Reboot your mikrotik router, and user manager package will be installed automatically 5. Open your browser (mozilla or chrome ) Enter url user manager = http://<WAN IP address Mikrotik Router>/userman, Enter username to login = admin, password = blank 6. Go to  customers menu , click  admin  and  please change the   login   password for security. How to setup

Pppoe server with profiles

Image
PPPoE Server Setup with Profiles Hi everyone. This is my second time i am writing any thing on INTERNET. In this article i will be setting up a PPPoE (point-to-point protocol over ethernet) Server with different profiles. First we will configure interface that is connected to WAN. / ip address add address=172.16.10.50/16 network=172.16.0.0 broadcast=172.16.255.255 interface=ether1 Now one interface is configured and connected to WAN (with ip 172.16.10.50/16). Now we will configure second interface for our Local Network. / ip address add address=10.10.10.1/24 network=10.10.10.0 broadcast=10.10.10.255 interface=ether2 Now we will configure PPPoE using WinBOX, download Winbox from  http://www.mikrotik.com  and login to you MT Router. Now goto IP > Pool. Press the PLUS sign in RED, then create a IP Address Pool that will be used by the PPPoE to give out IP (i am using 10.10.10.10-10.10.10.250) Press APPLY and OK. It should look something like this. Now we will

How to Hack WEP/WPA/WPA2 Wi-Fi Password- wifi hacking software free download

Image
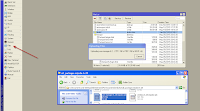
How to Hack WiFi Password ( WEP/WPA/WPA2)- Wifi hacking If you are living nearby someones WiFi hotspot and every time your laptop search for connection its showing up but you don't have passwords. Or you just want to steal someones WPA/WPA2 Wi-Fi hotpots key or passwords. Don't worry... In this tutorial I’ll show How to hack a WPA/WPA2 Wi-Fi connection through a bootable USB. Things you should need: 1. A USB pen drive. 2. beini.iso file. [Download it from HERE]. 3. UNetbootin software to make your USB drive bootable. [Download for Windows, Linux or Mac] Some few steps you should to do ( WEP): 1. Write beini.iso on your USB by UNetbootin. Set everything according to this image bellow. 2. After finishing restart your PC and boot it from your USB. 3. If you were successful to boot up then you should see something like this. Click Minidwep-gtk. 4. Click OK. 5. Now Minipwep-gtk  program will open. Click Scan. 6. Select a wireless network(should have Clint) from the list. A

ETHERNET CABLE: COLOR-CODE STANDARDS

Image
The information listed here is to assist Network Administrators in the color coding of Ethernet cables. Please be aware that modifying Ethernet cables improperly may cause loss of network connectivity. Use this information at your own risk, and insure all connectors and cables are modified in accordance with standards. The Internet Centre and its affiliates cannot be held liable for the use of this information in whole or in part. T-568A Straight-Through Ethernet Cable The T-568A standard is supposed to be used in new network installations. Most off-the-shelf Ethernet cables are still of the T-568B standard; however, it makes absolutely no functional difference in which you choose. T-568B Straight-Through Ethernet Cable Both the T-568A and the T-568B standard Straight-Through cables are used most often as patch cords for your Ethernet connections. If you require a cable to connect two Ethernet devices directly together without a hub or when you connect two hubs together,

How to Configure Repeater Mode on TL-WR702N

Image
Note: This FAQ is only suitable for TL-WR702N with firmware version 130314 or older; it is NOT suitable for 130528 or later version. Definition : The TL-WR702N copies and reinforces the existing wireless signal to extend the coverage of the signal. So the network name(SSID) and password don't change. This mode is especially useful for a large space to eliminate signal-blind corners. Application:  Large house,office,warehouse or other spaces where the existing signal is weak.   Physical Connection   Step 1: Connect the WR702N directly to your computer’s Ethernet port by an Ethernet cable;   Step 2: Power on the WR702N   Initial Computer Setup– For Windows 7, Vista & XP  (For Mac OS X, please go to page3)   Step 1: Windows 7 & Windows Vista : Go to  Start- > Control Panel - > Network and Sharing Center Windows XP : Go to  Start- > Control Panel- > Network Connections   Step 2: Windows 7 : Go to  Network andSharing Cent